[!ProTrack Warehouse Wiki^homepage-button_GRN_V3.png!]
Documentation for ProTrack Warehouse 2013 Q4.
If Manufacturing is enabled in the license key, the Assignments Inquiry has additional search functions:
- Search for a Work Order ID and it's associated activities will be displayed under Assignment Details.
- Search for an assignment ID and if it belongs in a Work Order, then all the other associated activities will be displayed as well under Assignment Details.
- Search for a standalone/split assignment that does not belong to a Work Order.
No matter which search option is selected, the user has the ability to add adjustments to assignment(s) and delete any adjustments that may have been created accidentally.
To access the Assignments Inquiry screen:
Log in to ProTrackWarehouse.
Select Assignments Inquiry under the Operations menu. The Assignments Inquiry screen appears.
Fig. 1 Assignments Inquiry
To View An Existing Work Order
- Select the Work Order radio button.
- Enter either the Work Order ID or the Assignment ID in a the appropriate fields.

Fig.2 Assignments Inquiry - Searching Work Order Click
 .
. 
Fig.3 Assignments Inquiry - Details
Info - The assignment ID displaying in the light blue color is the Parent assignment. This signifies that there were multiple employees working the same assignment or the same employee holding/resuming the assignment multiple times.
To View Existing Standalone/Split Assignments
- Select the Assignment radio button.
- Enter either the Work Order ID or the Assignment ID in a the appropriate fields.


Fig.4 Assignments Inquiry - Searching Assignment - Click .

Fig.5 Assignments Inquiry - Details
Adding Adjustments
Adjustments such as breaks, lunches, delays and indirects can be added to assignments via Assignments Inquiry screen.
- Search for the Work Order or Assignment and click
 .
. - Select the check box to the left of each assignment in which an adjustment will be made.

Fig.6 Assignments Inquiry - Adding Adjustments - Click
 and a popup screen will appear.
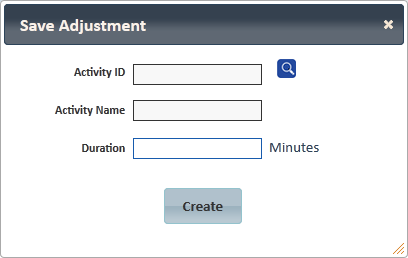
Fig.5 Assignments Inquiry - Select Adjustment - Select the adjustment that will be tied to each selected assignment.
- Enter the duration of the adjustment and click
 .
. - The adjustments will be added to each selected assignment. Each adjustment will receive the same duration entered in the popup.

Fig.7 Assignments Inquiry - Adjustments Added
Deleting Adjustments
- Enter the standalone or split assignment ID and click .
- Select the check box to the left of each adjustment assignment that will be deleted.
Fig.8 Assignments Inquiry - Deleting Adjustments - Click
 and a popup will appear asking to confirm the selected assignments will be deleted. Click
  .
. - Screen will refresh and the adjustments will no longer be displayed.
Overview
Content Tools