Documentation for ProTrackWarehouse 2017.1.
View Existing Standalone/Split Assignments
- Select the Assignment radio button.
- Enter the Assignment ID and click Submit.
- The assignment details will be displayed on the screen.
View An Existing Work Order
- Select the Work Order radio button.
- Enter either the Work Order ID or the Assignment ID in a the appropriate fields.
Click Submit.
Info
- The assignment ID displaying in the light blue color is the Parent assignment. This signifies that there were multiple employees working the same assignment or the same employee holding/resuming the assignment multiple times.
Adding Adjustments
Adjustments such as breaks, lunches, delays and indirects can be added to assignments via Assignments Inquiry screen.
- Search for the Work Order or Assignment and click Submit.
- Select the check box to the left of each assignment in which an adjustment will be made.
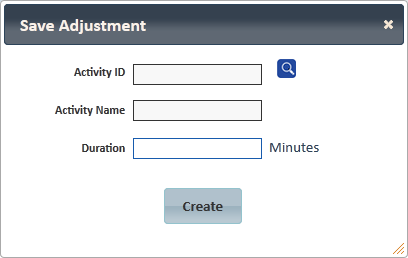
- Click Add and a popup screen will appear.
- Select the adjustment that will be tied to each selected assignment.
- Enter the duration of the adjustment and click Create.
- The adjustments will be added to each selected assignment. Each adjustment will receive the same duration entered in the popup.
Fig.7 Assignments Inquiry - Adjustments Added
Deleting Adjustments
- Enter the standalone or split assignment ID and click .
- Select the check box to the left of each adjustment assignment that will be deleted.
Fig.8 Assignments Inquiry - Deleting Adjustments - Click and a popup will appear asking to confirm the selected assignments will be deleted. Click .
- Screen will refresh and the adjustments will no longer be displayed.
Overview
Content Tools


