[!ProTrack Warehouse Wiki^homepage-button_GRN_V3.png!]
Documentation for ProTrack Warehouse 7.6.
The Labor Plan screen is used to forecast and plan labor demand. The ability to forecast and plan labor in a warehouse will enable you to deploy resources optimally and maximize labor utilization.
Labor Plan Tab Descriptions
Tab |
Description |
|---|---|
Displays the progress bars for each activity group in an active labor plan. |
|
Create labor plan based on specific criteria. |
|
Displays all active labor plans for the day. |
|
Lists all created labor plans for a specified facility and date. |
|
Set up the default configurations for future labor plans. |
|
Online help guide that will provide step-by-step instructions on the creation of a labor plan. |
Table 1. Labor Plan Tab Descriptions
To access the Labor Plan screen:
- Log in to ProTrack Warehouse.
- Select the Labor Plan menu and a popup window appears.
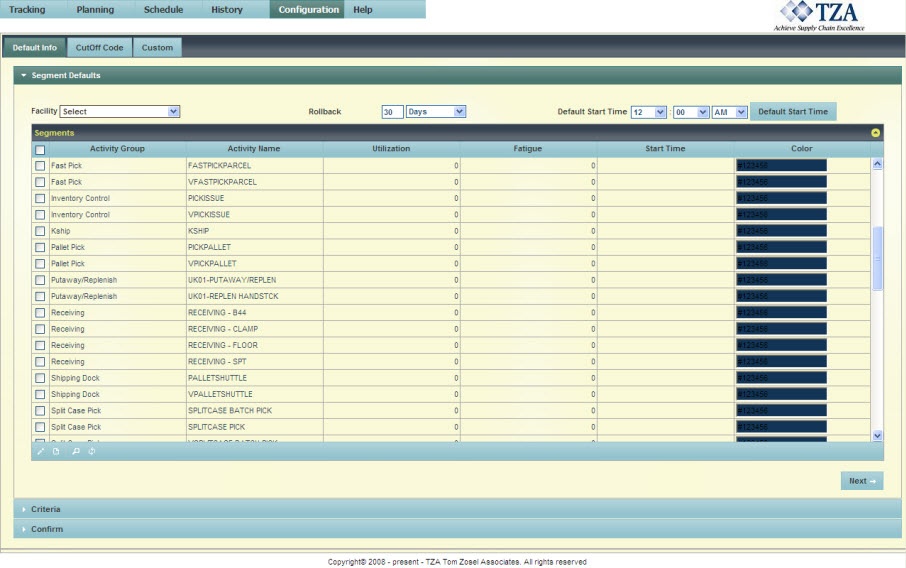
Fig.1 Labor Plan
Info
- Configuration screen will be the default screen if labor plan has not been run for a facility before.
- The default facility will be based on which facility the user is assigned to.
Tracking
To track the progress of an active labor plan:
- Click on the 'Tracking' tab to access the screen.
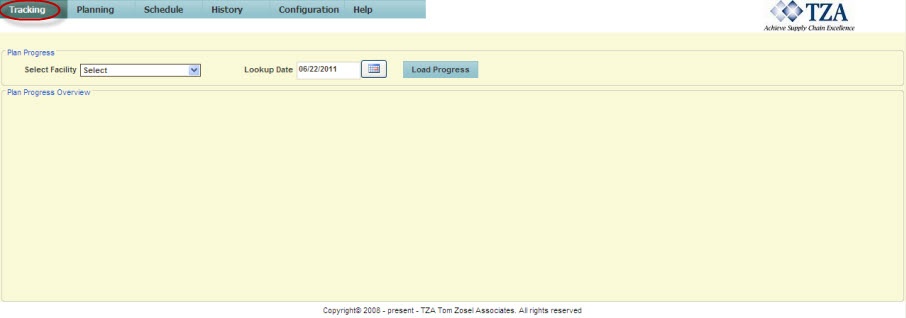
Fig.2 Labor Plan - Tracking - Select the facility from the drop down list.
- Click
 to specify the Lookup Date.
 - Click 'Load Progress' to load the plan.
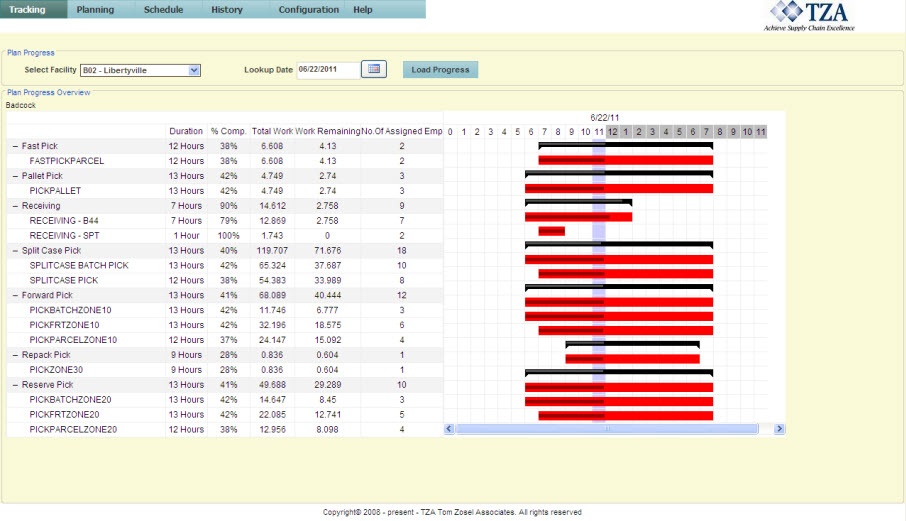
Fig.3 Labor Plan - Tracking
Creating a Labor Plan
To create a new labor plan:
- Click on the 'Planning' tab to access the screen.

Fig.4 Labor Plan - Plan Info - Select the facility from the drop down list.
- Type a plan name.
- Click to select the plan date.
- Select the start and end times of the plan.
- If planning by cutoff or round robin, select the corresponding check box.
- Click 'Next' to move to Plan Employees.
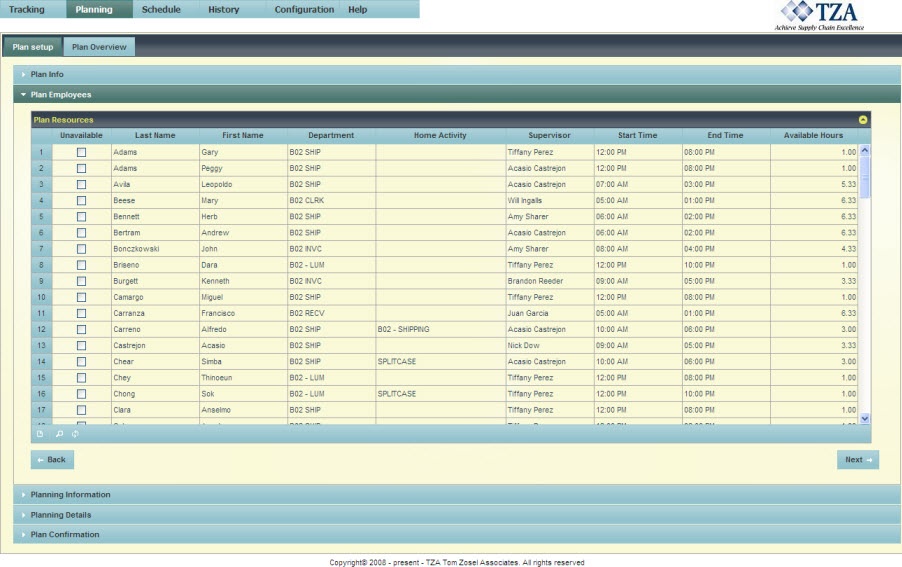
Fig.5 Labor Plan - Plan Employees - Select the check box next to each employee that is unavailable to work that day.
- Click 'Next' to move to Planning Information.
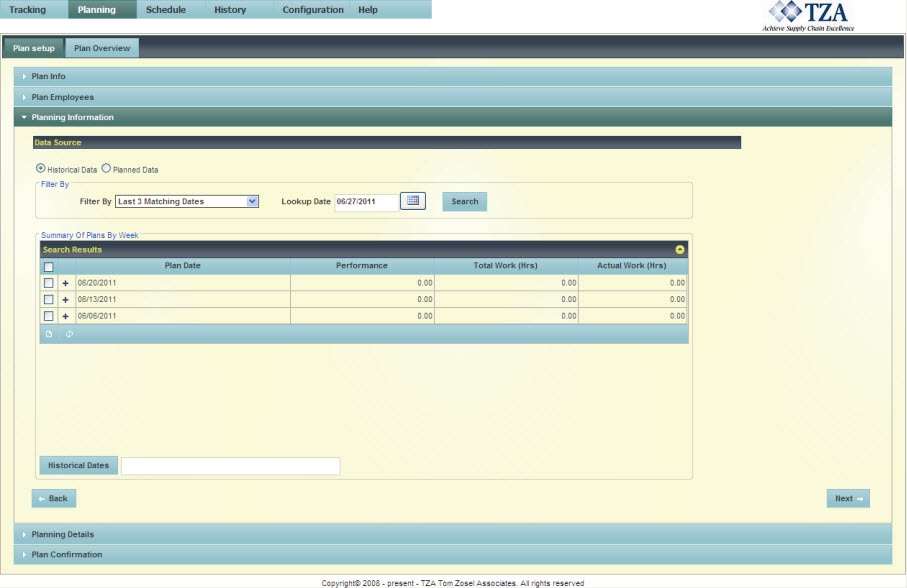
Fig.6 Labor Plan - Planning Information - Select the data source to use for forecasting the labor plan, either Historical Data or Planned Data.
- Select the filter from the drop down list.
Filter DescriptionsTable 2. Filter DescriptionsFilter
Description
Last 3 Matching Dates
Lists the last three like day of week. For example, if you select a Monday the list will display the previous three Mondays.
Last Week Dates
Lists the week of the specified lookup date.
Manually Chosen Calendar Dates
Specify which dates to use by clicking
, click the date, click 'Search', select the check box in the 'Search Results' section, and click 'Historical Dates'.First Mondays of Last 3 Months
Lists Mondays of the previous three months.
Last 3 Mondays Not 1st Monday of Month
Lists Mondays of the previous three weeks excluding the first Monday of the month.
- Select the check boxes next to the dates to be used for forecasting.
- Click 'Next' to move to Planning Details.
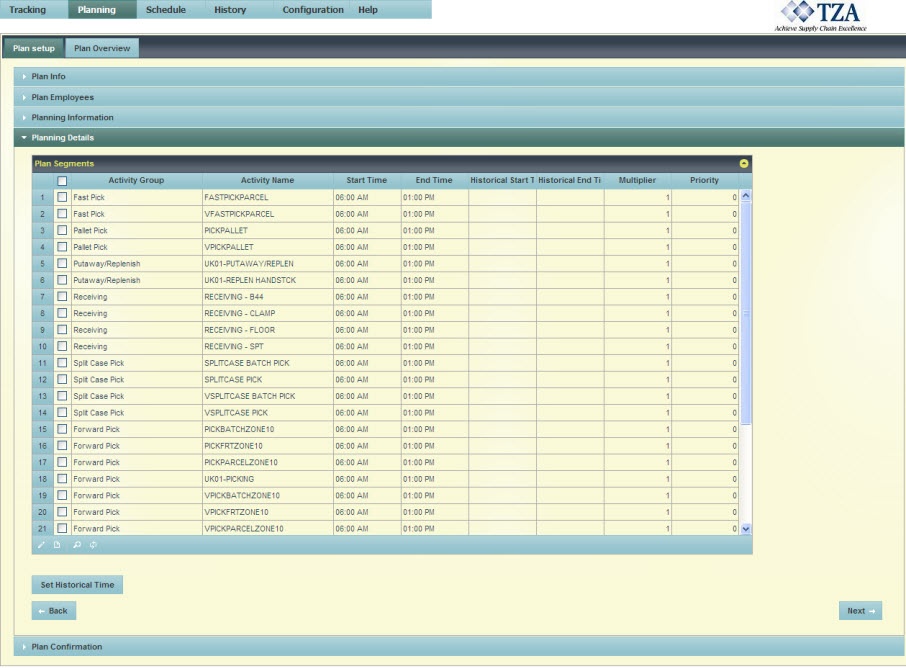
Fig.7 Labor Plan - Planning Details - Select the check boxes next to the activity groups that will be in the labor plan.
- Click
 to change the start and end time of an activity group.
 - Click 'Set Historical Time' to use the start and end times of dates selected in Planning Information.
Info
- Historical start and end times will populate in the appropriate columns if the dates selected from Planning Information contain the times. If the columns are blank, it means there were no historical start and end times for the selected dates.
- Click 'Next' to move to Plan Confirmation.
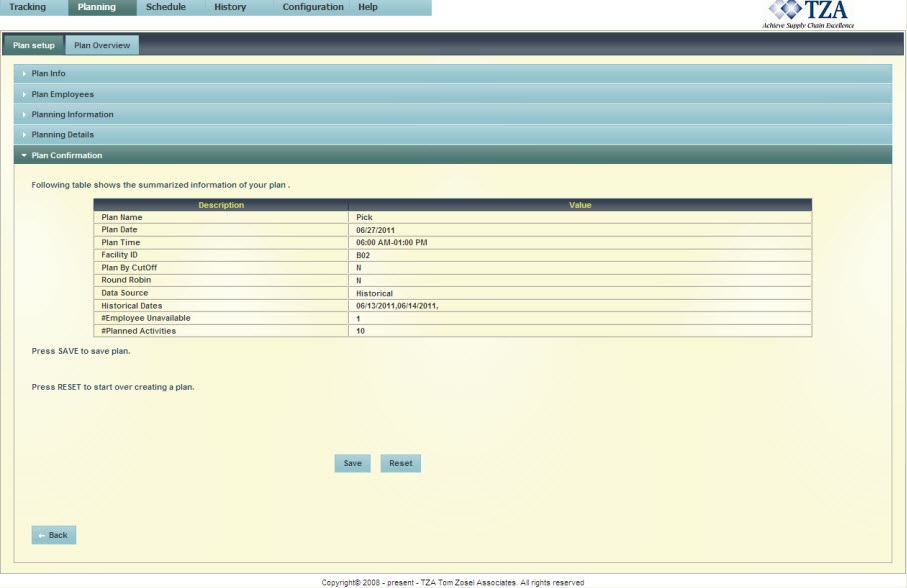
Fig.8 Labor Plan - Plan Confirmation - Review the plan details and make changes as needed.
- Click 'Save' to save the labor plan.
Tip
- Click 'Reset' to start over and create a new plan.
Viewing Labor Plans
To view active labor plans:
- Click on the 'Schedule' tab to access the screen.
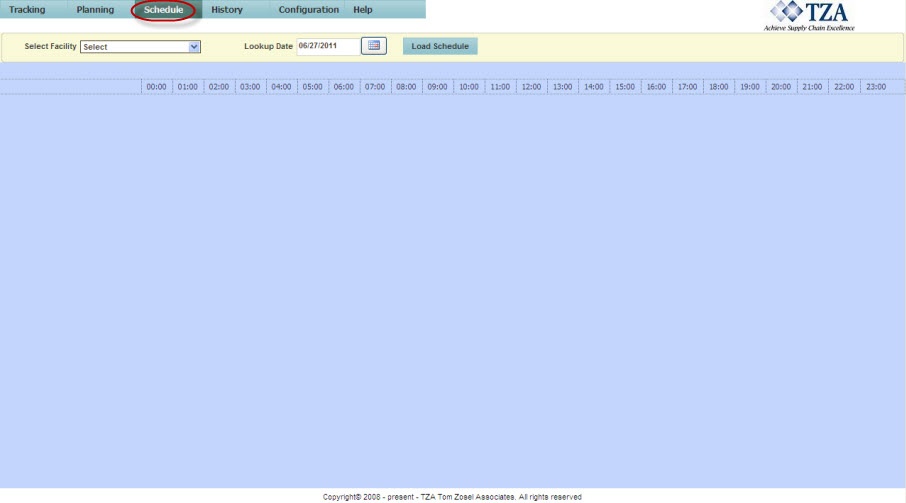
Fig.9 Labor Plan - Schedule - Select the facility from the drop down list.
- Click to specify the lookup date.
- Click 'Load Schedule' to display all active labor plans.
Viewing History
To view previously created labor plans:
- Click on the 'History' tab to access the screen.
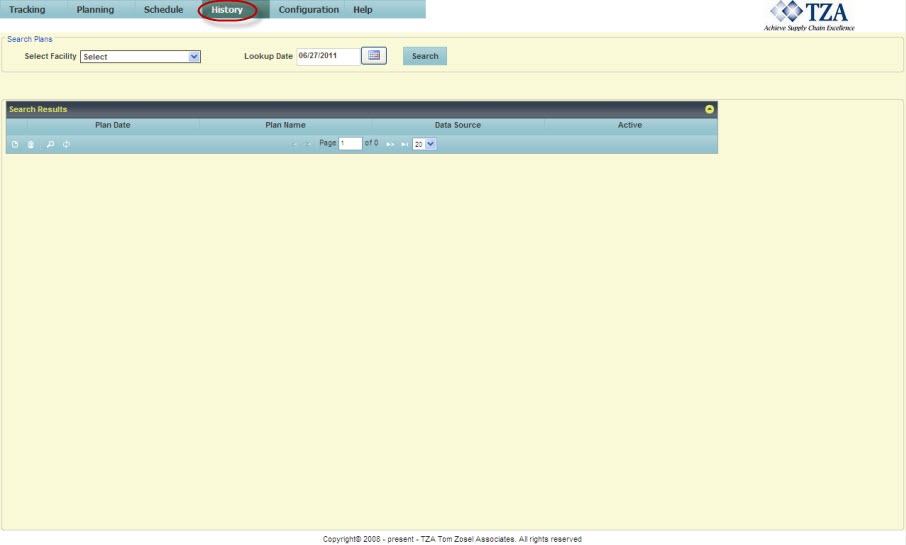
Fig.10 Labor Plan - History - Select the facility from the drop down list.
- Click to specify the lookup date.
- Click 'Search' to list all labor plans created for that lookup date.
Setting Up The Configuration
This screen allows you to set up the default values for future labor plans, such as the start time and the associated colors for each activity group.
Configuration Tab Descriptions
Tab |
Description |
|---|---|
Default Info |
Displays the details for each activity group. |
CutOff Code |
Lists all codes used for planning by cutoff times. |
Custom |
Specify a color for each activity group. |
Table 3. Configuration Tab Descriptions
- Select the Default Start Time for the labor plan and click 'Default Start Time' button. This will set the start time for all activity groups to the specified time.
- To set different start times for activity groups, select the activity group from the list and click at the bottom left of the screen. This will open a popup window.
- Enter the default start time for this activity.
- Click the arrows to move up and down the list to change the default start times of other activity groups.
- Click 'Next' to move to the next section.
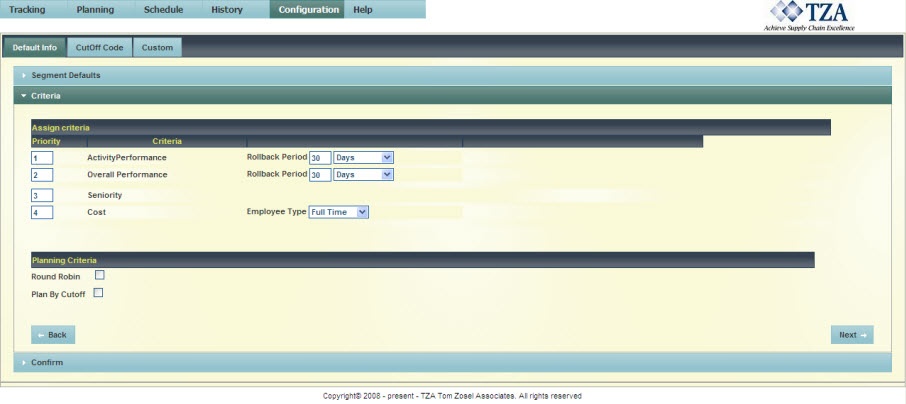
Fig.11 Labor Plan - Criteria - Set the priority of each Criteria. This priority will determine how employees are assigned to each activity group.
- If you plan to create a plan based on Round Robin or Plan by Cutoff, select the appropriate check box.
- Click 'Next' to move to the next section.
- Click 'Save' to save the configuration settings.
- Click on the 'CutOff Code' tab.
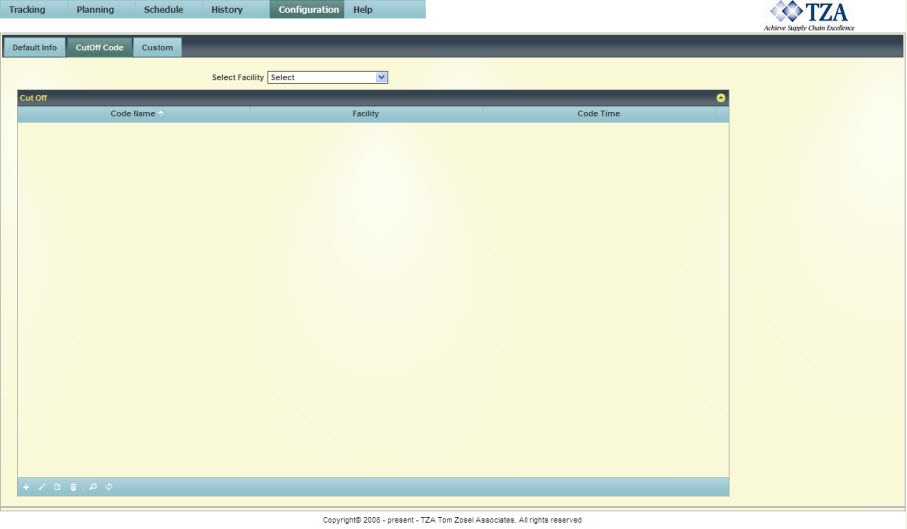
Fig.12 Labor Plan - Cutoff Code - Click '+' at the bottom left of the screen and a popup window appears.
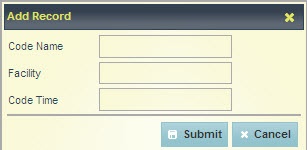
Fig.13 Labor Plan - Adding Cutoff Code - Type the Code Name, Facility, and Code Time. Click 'Submit' to add the record.
- Create a record for each cutoff code.
- Click on the 'Custom' tab to set the default colors for each activity group.

Fig.14 Labor Plan - Custom - Select the Color Code for an activity group.
- Select which color to assign to the activity group using the color wheel.
- Once all activity groups have been assigned a color, select 'Save' to save the colors.

Fig.15 Labor Plan - Custom Colors
Help Guide
To access the online help guide:
- Click on the 'Help' tab to access the screen.

Fig.16 Labor Plan - Help Guide - This will open up a new window that will direct you to the online help guide.
Overview
Content Tools