[!ProTrack Warehouse Wiki^homepage-button_GRN_V3.png!]
Documentation for ProTrack Warehouse 7.6.
The Kiosk can be used to work standard assignments from three different sources:
- Pre-download WMS Assignments
- Assignments created in advance via the KVI Entry screen
- Assignments created at the Kiosk
Predownloads are WMS work assignments that are imported into ProTrack Warehouse. Predownloads are different in that the assignments do not have a start date, start time, end date and end time. There is also no Employee Id because no one has performed the assignment yet.
To access the Kiosk screen:
- Log in to ProTrack Warehouse.
- Select the Work Assignment tab under the Kiosk menu. The Work Assignment screen appears.
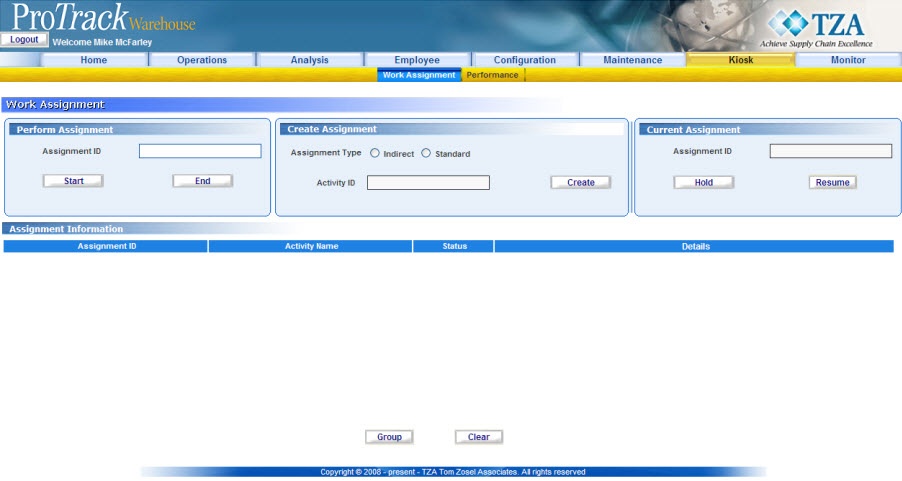
Fig.330 Kiosk
Starting An Assignment
To start an assignment:
- Enter an assignment into the Assignment ID field.
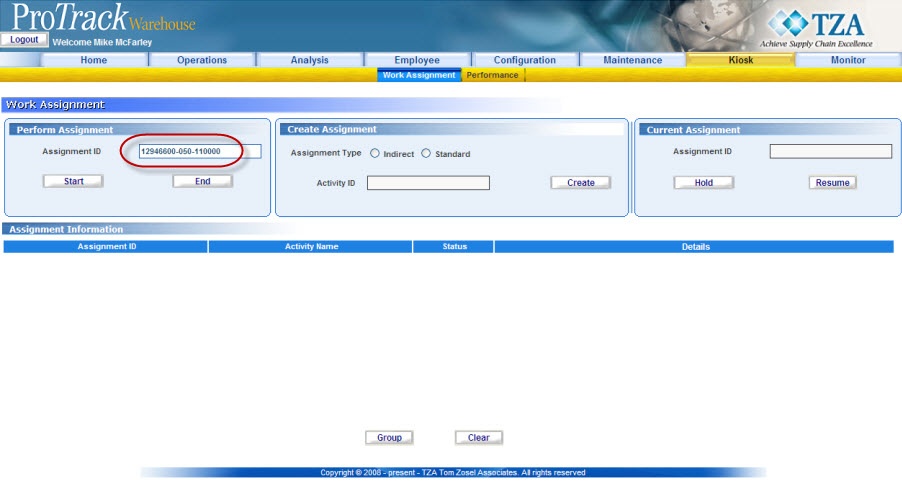
Fig.331 Kiosk - Starting Assignment - Click
 below the field. The status of the assignment will be set to In-Progress in the ‘Assignment Information’ section. The Standard Time for the assignment will also be displayed, assuming the Kiosk is configured to show standard time (refer to Work Info).
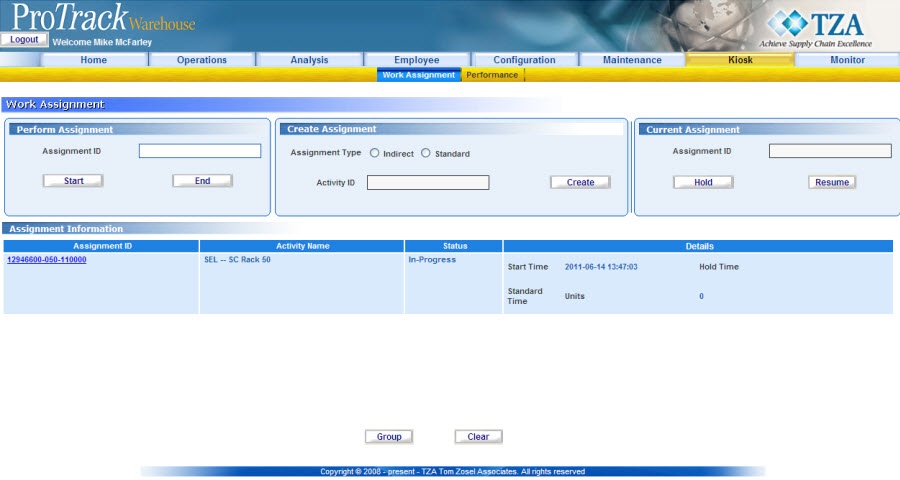
Fig.332 Kiosk - In Progress
Info
- If there is any assignment that is currently In-Progress, starting this new assignment will simultaneously end the previous assignment. The end time for that assignment will be recorded as the same time the new assignment is created.
If the standard time for the entered assignment has not yet been calculated (due to the assignment being recently imported), ProTrack will calculate the standard time “on-the-fly” and then display this standard time on the screen once it’s calculated. Typically this process only takes a few seconds, but may sometimes take longer. In either case, a “Not Yet Available” message will be displayed to the user; the user may either choose to wait for the time to be displayed, or can simply logoff before this process is completed.

Fig.333 Kisok - Standard Not Yet Available.
Ending An Assignment
An assignment is ended from the ‘Perform Assignment’ section in the Kiosk screen. An assignment can either be explicitly ended, or indirectly ended by starting a new assignment.
To end an assignment:
- Click the Assignment ID link in the ‘Assignment Information’ section of the Kiosk screen. The Assignment ID field will be automatically populated with the in-progress assignment.
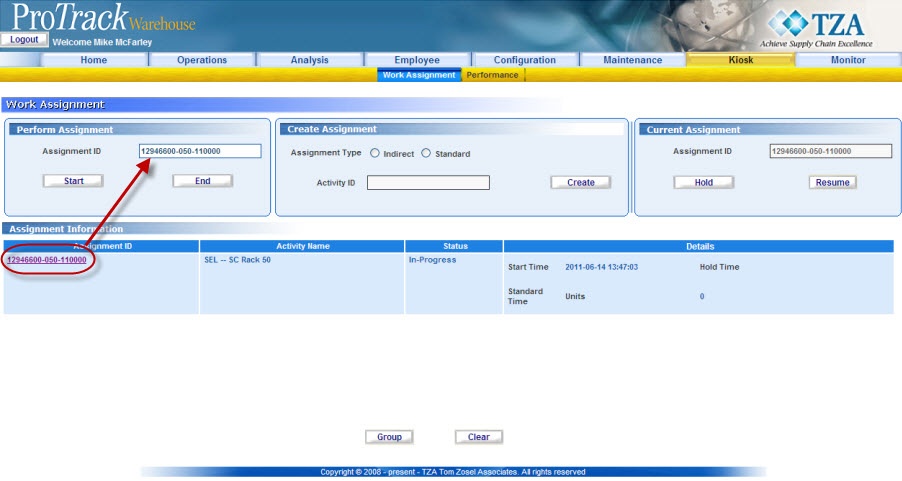
Fig.334 Kiosk - End Assignment
Info
- The Assignment ID can be manually typed in the Assignment ID field.
- Click
 in the ‘Perform Assignment’ section of the Kiosk screen.
Holding & Resuming An Assignment
To put an assignment on-hold:
- Click the Assignment ID link in the ‘Assignment Information’ section of the Kiosk screen. The Assignment ID field will be automatically populated with the in-progress assignment.
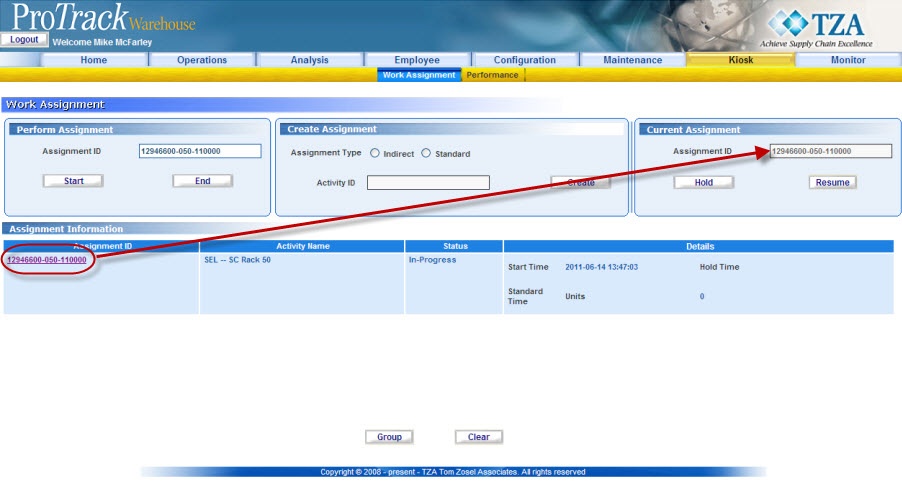
Fig.335 Kiosk - Holding Assignment - Click
 . The status of the assignment will be set to HLD in the ‘Assignment Information’ section.
Info
- Assignment can be Held today and Resumed tomorrow.
To resume an assignment:
- Click the Assignment ID link in the ‘Assignment Information’ section of the Kiosk screen. The Assignment ID field will be automatically populated with the in-progress assignment.
- Click
 . The status of the assignment will be set to In-Progress in the ‘Assignment Information’ section.
Splitting An Assignment
ProTrack Warehouse provides the capability to allow two or more associates to be working on the same assignment concurrently. If an Active assignment is linked to an associate and another associate requests to work on the same assignment, ProTrack Warehouse splits the assignment into separate assignments. The split assignments will be linked to each associate. The start time and end time are recorded for each associate independently against their respective assignment.
To split an assignment:
- Enter the shared Assignment ID in the Assignment ID field of the 'Perform Assignment' section of the Kiosk screen.
- Click in the 'Perform Assignment' section and a new assignment will be generate: the original assignment ID with a "-1" appended to the end.
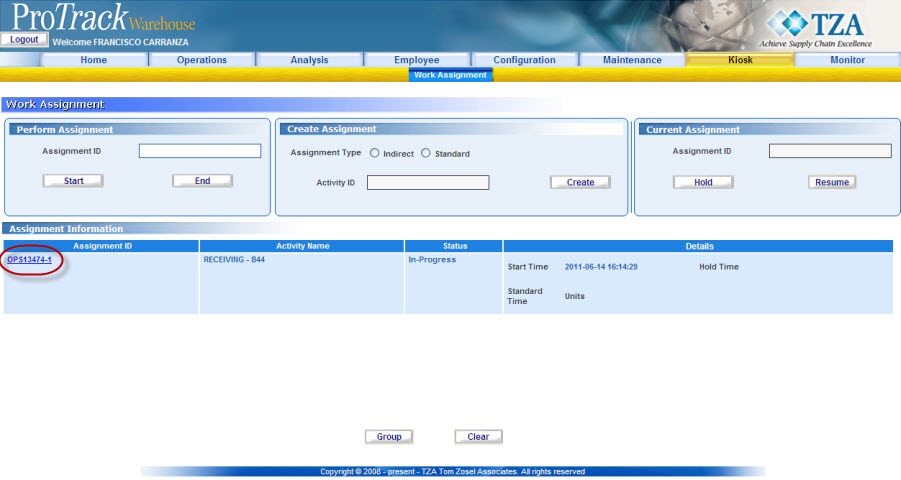
Fig.336 Kiosk - Split Assignment - The new assignment ID is shown in the Assignment ID field of 'Current Assignment' section and the status of the assignment is set to INP in the 'Assignment Information' section.
Grouping Assignments
To increase efficiency, ProTrack Warehouse provides the capability to allow an employee to perform multiple assignments at once. A user can create a "group" assignment by creating a list of individual assignments and then grouping them all together. The newly-created assignment ID will start with "GRP".
To Group Assignments:
- Ensure that the employee has the capabilities to Group Assignments in the Kiosk (refer to Work Info).
- Click
 at the bottom of the screen. A popup screen appears.
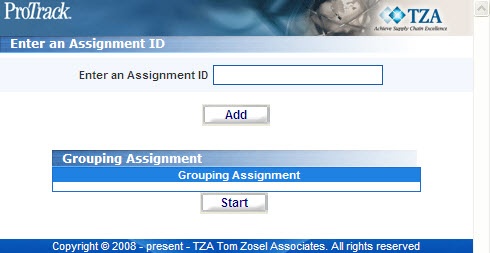
Fig.337 Kiosk - Grouping Assignments - Enter an assignment and click
 .
. - Repeat until all assignments have been added.
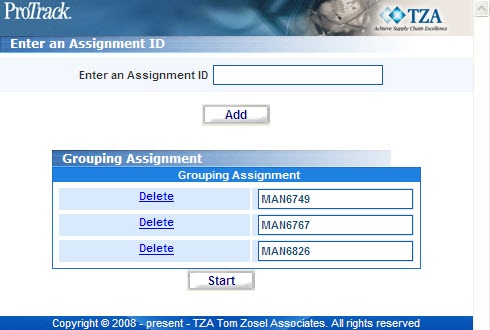
Fig.338 Kiosk - Grouping Multiple Assignments
Tip
- To remove an assignment from the group, click the Delete link next to the assignment.
- Click to start the Group Assignment.
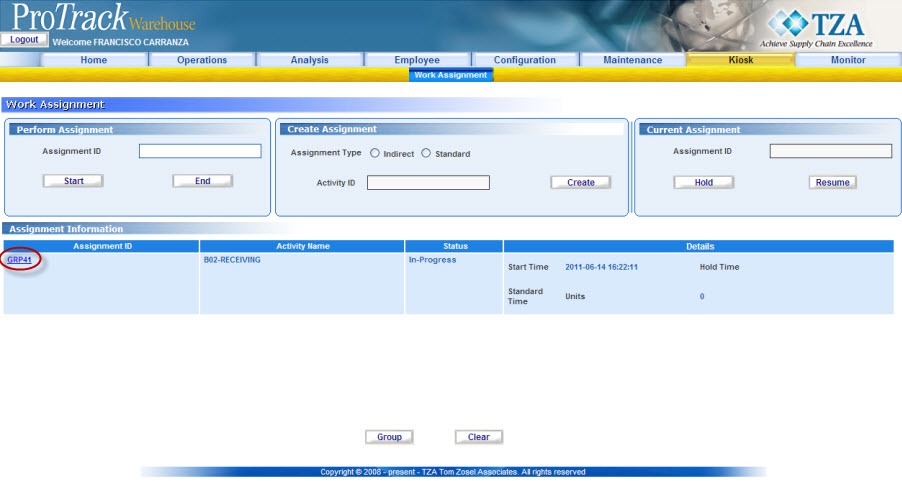
Fig.339 Kiosk - Grouped Assignments
Creating a "Manual" Standard Assignment at the Kiosk
ProTrack Warehouse enables a warehouse associate to create a standard assignment at the Kiosk, "on-the-fly". An assignment need not exist ahead of time in this scenario.
To create a standard assignment:
- Ensure the facility is configured to allow creation of standard assignments through the Kiosk (refer to Facility).
- Click on the Standard assignment type radio button.
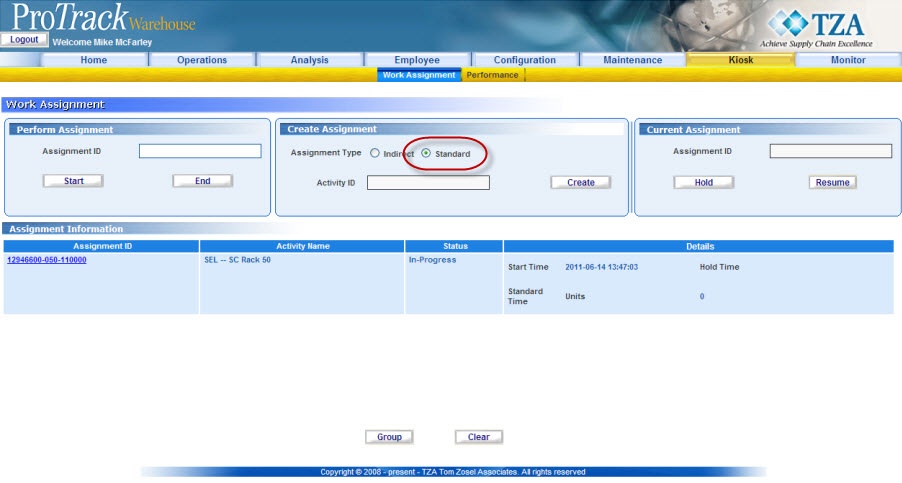
Fig.340 Kiosk - Standard Assignment - A popup window appears, listing activities that have been setup for "Manual" assignments.
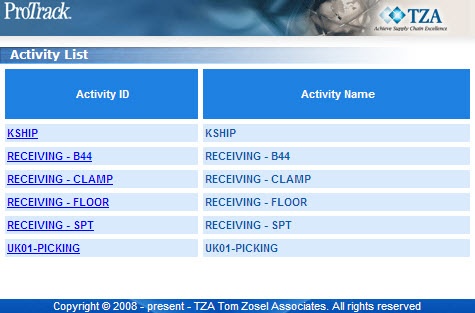
Fig.341 Kiosk - Activity List - Click on the activity ID link for the assignment.
- Click
 and the KVI Entry screen will appear.

Fig.342 Kiosk - KVI Entry - If KVI counts are known ahead of time, click
 and enter the counts within the respective fields.
 - Click
 once the counts have been entered or if counts are unknown.
 - The newly-created assignment will be listed in 'In Progress' status on the Kiosk screen.
Indirect Assignments
To create an Indirect Assignment in Kiosk:
- Select the Indirect assignment type radio button in the 'Create Assignment' section of Kiosk screen.
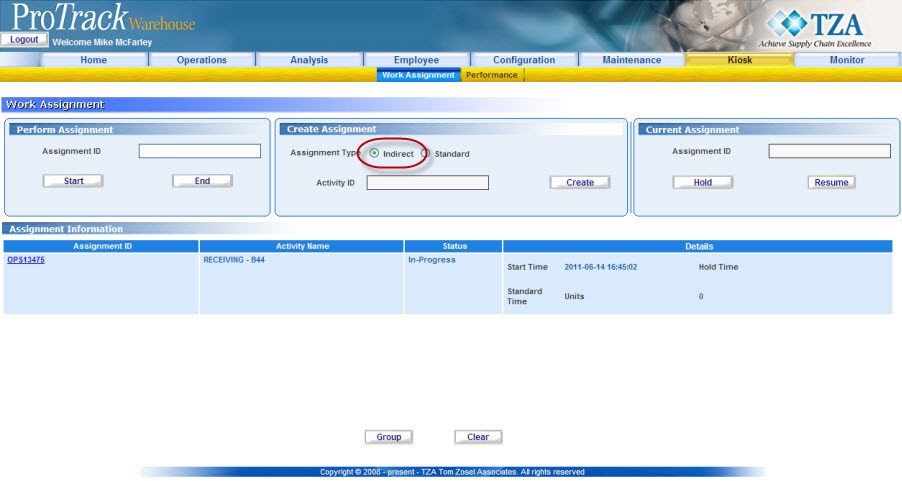
Fig.343 Kiosk - Indirect Assignments - A list of indirect activities appears in a popup window.

Fig.344 Kiosk - Indirect Activity List - Click the selected Activity ID link. The Activity ID is updated in the Activity ID field.
- Click in the ‘Create Assignment’ section of the Kiosk screen. The Indirect Activity will appear in 'Assignment Information' as In Progress.
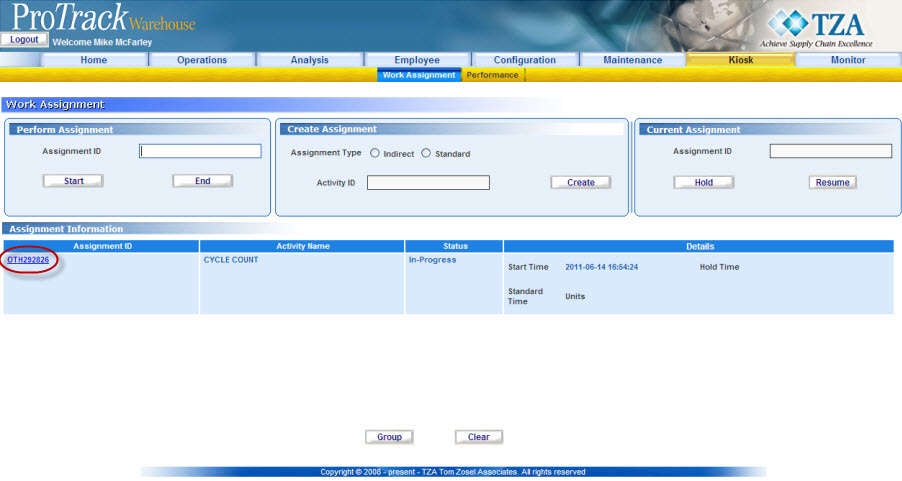
Fig.345 Kiosk - Indirect In Progress
Info
- Indirect assignments created through the kiosk will have assignment IDs beginning with "OTH".
Logging Out
Logging out of the system will log the employee out of the Kiosk screen. The next employee will then be able to log into his/her own Kiosk screen.
Info
- If a work assignment is left in the 'In Progress' status, at the end of the employees work schedule it will be automatically ended. It will go into "Error" status and appear on the Exception report for the supervisor to correct.
To Logout of the system:
- Click
 in the upper-left corner of the screen.
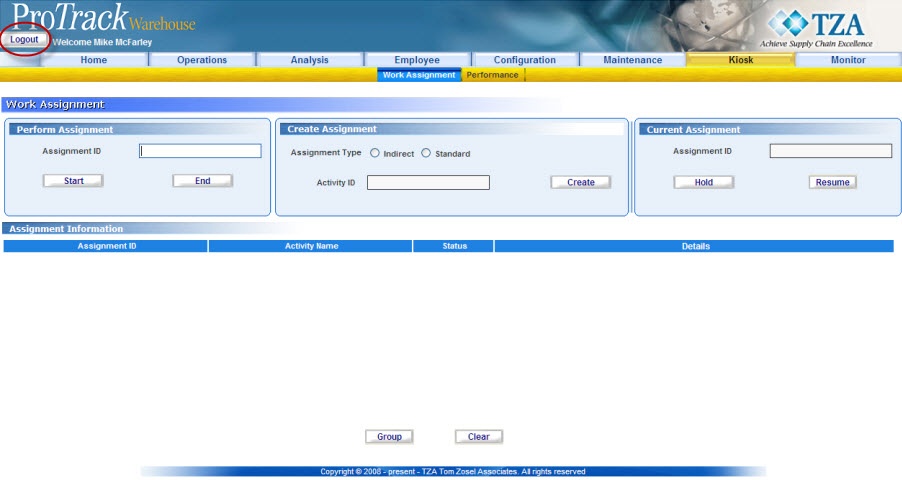
Fig.346 Logging Out
Overview
Content Tools