[!ProTrack Warehouse Wiki^homepage-button_GRN_V3.png!]
Page History
The Alert system is designed to perform some sort of action based on a triggering mechanism. The alerting system requires data as an input, a decision on what data to act on, and a set of output actions. The triggering mechanism can be an agent or a scheduled request that is supplied some sort of data or goes out and gets some sort of data to act upon. This data can be filtered and the results used to trigger a set of actions. The actions are what can be done based on the rules of the triggering mechanism, such as send out an email, run stored procedure, run a batch job, etc.
The most common action is to send out a message indicating something happened. For example, we can fire off a process every day that returns a list of employees that had poor performance below some threshold. Then for each of these, we can send out an email to a designated person indicating that employee’s performance. The recipient can also be required to acknowledge that he received the email, and if not, a second person can be notified in an escalation process.
To access the
Maintain Alerts in ProTrack Warehouse is used to setup alerts and alert parameters for pre-determined recipients. Maintain Alert is also used to set up a list of subscribers and their email addresses.
To access the Maintain Alerts screen:
- Log in to ProTrack Warehouse.
Select Alert under the Configuration menu. The Maintain Alerts screen appears.
Fig.1 Maintain AlertsMaintain
Acknowledging Alerts
...
Tab | Description |
|---|---|
Monitor Plan | Displays alert plan details and entities that are monitored by that plan. |
Alert Levels | Displays details of different alert criteria like performance, utilization, effectiveness, and quality. |
Subscribers | Displays shows subscriber details to send alerts to either through the screen or through an e-mail. |
...
Field | Description |
|---|---|
Alert Plan | Type a plan name, which is alphanumeric (combination of Alphabets and Numbers). |
Monitor Level | Select the Alert Monitoring level. Currently individual is the only option. |
Response Time | Type the Hours or Minutes given to a subscriber to respond to an alert. |
Reminder Time | Type the reminder time. |
Start Date | Click and select the Start Date of the alert plan, which should be earlier than End Date. |
End Date | Click to select the End Date of the alert plan. |
Use Reminder | If Use Reminder check box is selected, type the Reminder Time. |
Disable Alert | Click ‘Yes’ to disable the alert, if not click ‘No’. |
Table 2. Maintain Alerts Field Descriptions
Adding Alerts
To add a new alert:
...
| Tip | ||
|---|---|---|
| ||
|
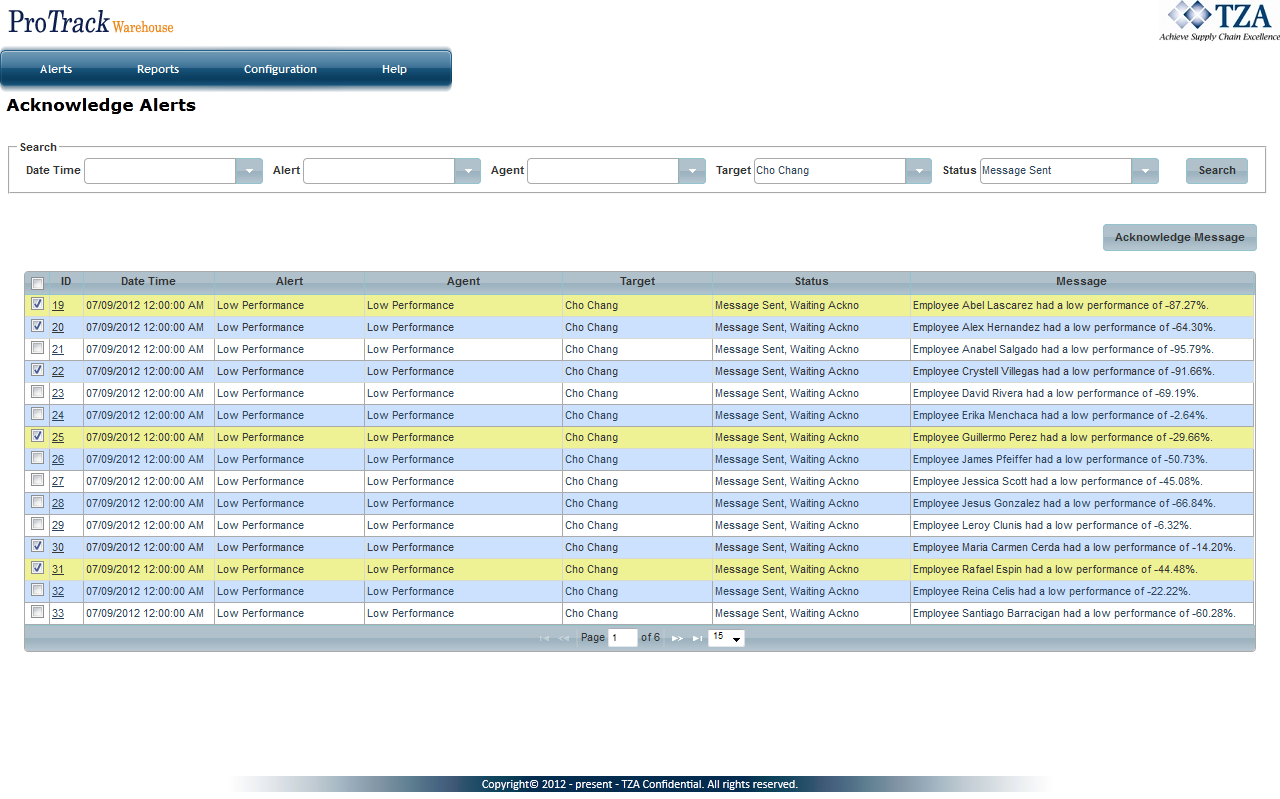
To acknowledge a new alert:
- Select the check box to the left of the alert.
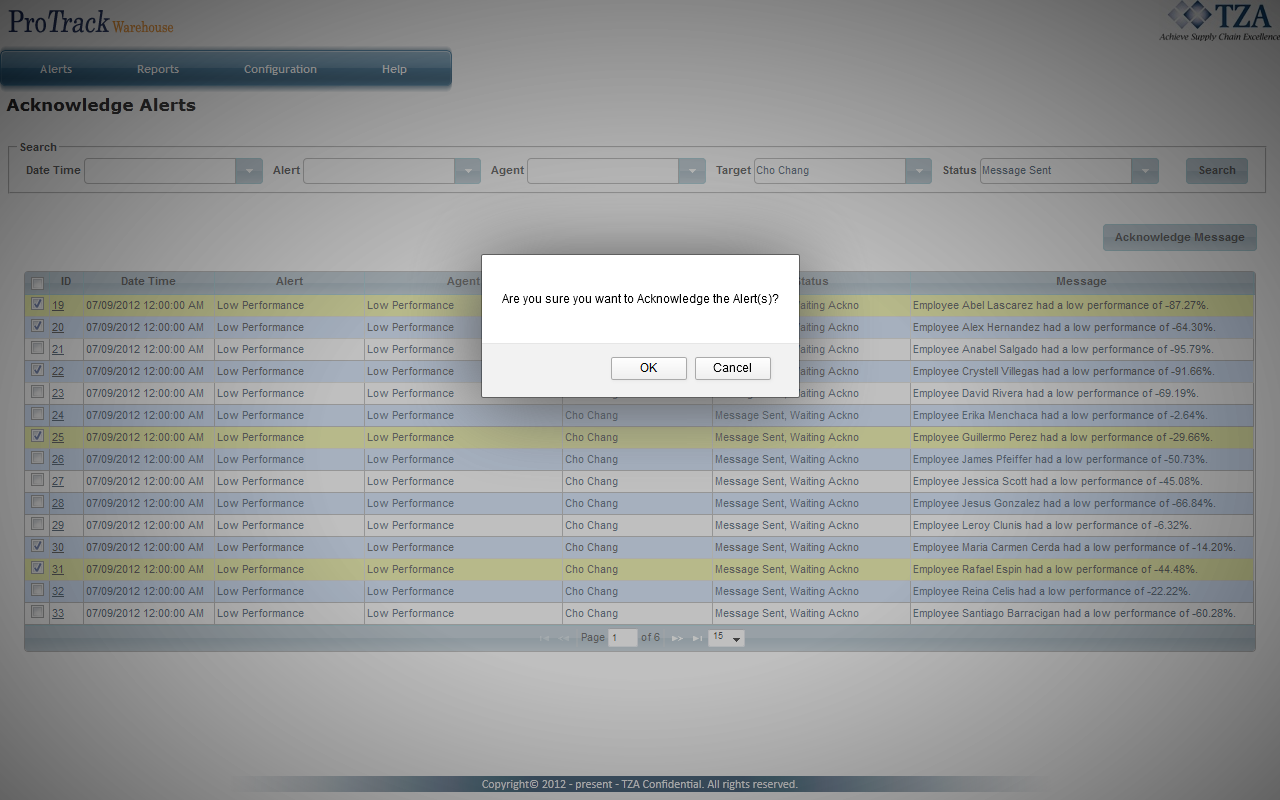
Fig.2 Acknowledge Alerts - Click . A popup will appear asking to confirm the alert(s) will be acknowledged. Click .
Fig.3 Confirm Acknowledging of Alerts
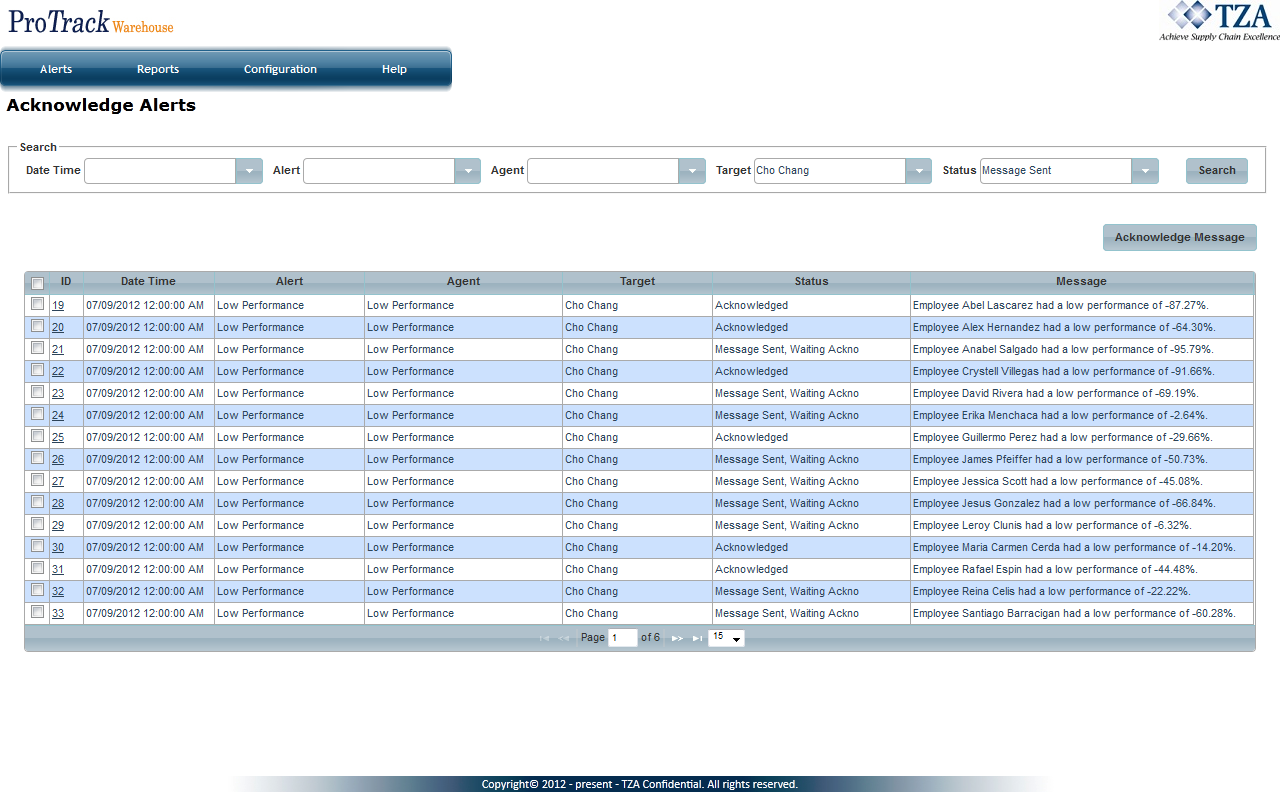
- The status of the alerts will be changed to Acknowledged.
Fig.4 Alerts Have Been Acknowledged
Alert History
The Alert History screen is a listing of alert actions that have been executed, and their status, if any. Every alert action, including wait and repeat, gets logged into history. If the action was an email, the email message gets saved. If the alert was an email requiring an acknowledgement, it will get logged with the status of acknowledged or waiting for acknowledgement. By clicking on one of the entries, you get a pop-up the more detailed information regarding the alert, such as when and who acknowledged an email action.
Fig.5 Alert History
Creating an Alert
To create an alert:
- Subscribers must be created to know who will be notified.
- Alerts must be configured to determine what action will be performed.
- Agents must be configured to allow some sort of data input for the alert to be triggered.
- Events must be configured to generate the data that can be used for alerting.
- Event Scheduler must be configured to determine when the alert should be executed
...
...
Alert Level Field Descriptions
Field | Description |
|---|---|
Performance Alert Lower Limit | Indicates the acceptable lower level of normal performance that is being monitored. |
Performance Alert Upper Limit | Indicates the upper level of normal performance that is being monitored. |
Performance Critical Lower Limit | Indicates the acceptable lower level of critical performance that is being monitored. |
Performance Critical Upper Limit | Indicates the upper level of critical performance that is being monitored. |
Utilization Alert Lower Limit | Indicates the acceptable lower level of utilization that is being monitored. |
Utilization Critical Lower Limit | Indicates the acceptable critical lower level of utilization that is being monitored. |
Effectiveness Alert Lower Limit | Indicates the acceptable normal lower level of effectiveness that is being monitored. |
Effectiveness Critical Lower Limit | Indicates the acceptable critical lower level of effectiveness that is being monitored. |
Message | Type a corresponding message for any of the criteria (Performance, Utilization, and Effectiveness) depending on the Normal or Critical Limit. |
...
Field | Description |
|---|---|
No. Of Errors - Alert Normal Limit | Indicates the acceptable number of errors for normal level for the given Unit Of Measure (UOM). |
No. Of Errors - Critical Limit | Indicates the acceptable number of errors for critical level for the given UOM. |
% Of Errors - Alert Normal Limit | Indicates the acceptable percentage of errors for normal level for the given UOM. |
% Of Errors - Critical Limit | Indicates the acceptable percentage of errors for critical level for the given UOM. |
UOM | Unit Of Measure (Cases, Lines, Pallets, Units). |
Message | Type a corresponding message for the criteria (No. of Errors or % of Errors) depending on the Normal or Critical Limit. |
...
...
...
...
Click to save the plan.
| Info | ||
|---|---|---|
| ||
|
Searching Alerts
To search for particular plans:
...
...
Click and the records for the selected criteria will be listed in the 'Alert Search Results' section.
| Tip | ||
|---|---|---|
| ||
|
Viewing & Editing Alert Plans
To view and edit the plan:
- Search and list the alert plans you want to view or edit in the ‘Alert Search Results’ section.
- Click the Alert Plan link from the ‘Alert Search Results’ section. The details of the plan appear in the corresponding fields in the Maintain Alerts screen.
Change the required fields and click to save the changes.
Tip title Tips - If you have made the changes in the fields and do not want to save the details, click before you save the changes.
- If you want to add an alert plan at this point, click to clear the fields and to bring the screen to add mode.
- To delete a subscriber select the corresponding check boxes and click .
Deleting Alert Plans
To delete the plans:
- Search and list plans in the ‘Alert Search Results’ section.
Select the Alert Plans in the ‘Alert Search Results’ section by selecting the check box of each plan.
image image MA Delete.jpg title Fig.261 Maintain Alerts - Delete Plan - Click and the selected plans are deleted.


