[!ProTrack Warehouse Wiki^homepage-button_GRN_V3.png!]
Page History
...
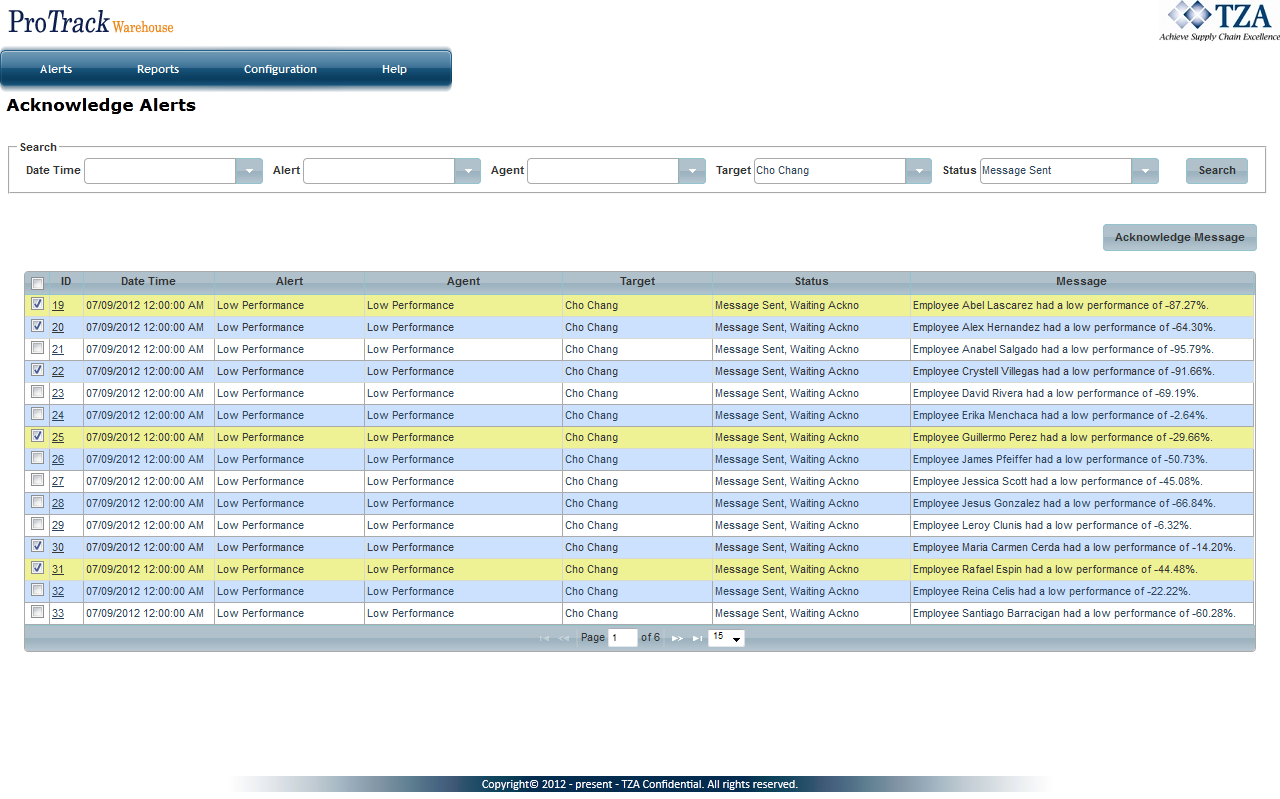
- Select the check box to the left of the alert.
Fig.2 Acknowledge Alerts - Click . The message will disappear from the list and the status will be changed to Message Acknowledged.
...
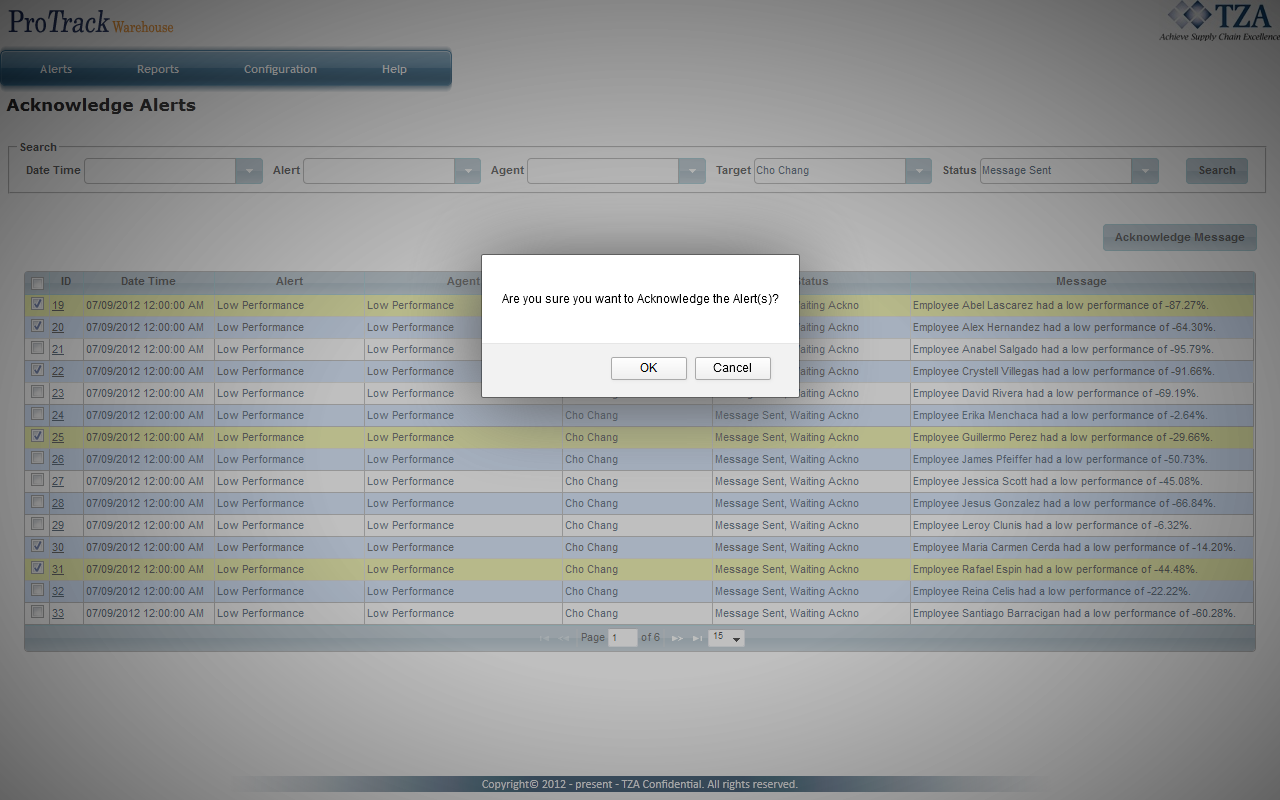
- A popup will appear asking to confirm the alert(s) will be acknowledged. Click .
Fig.3 Confirm Acknowledging of Alerts
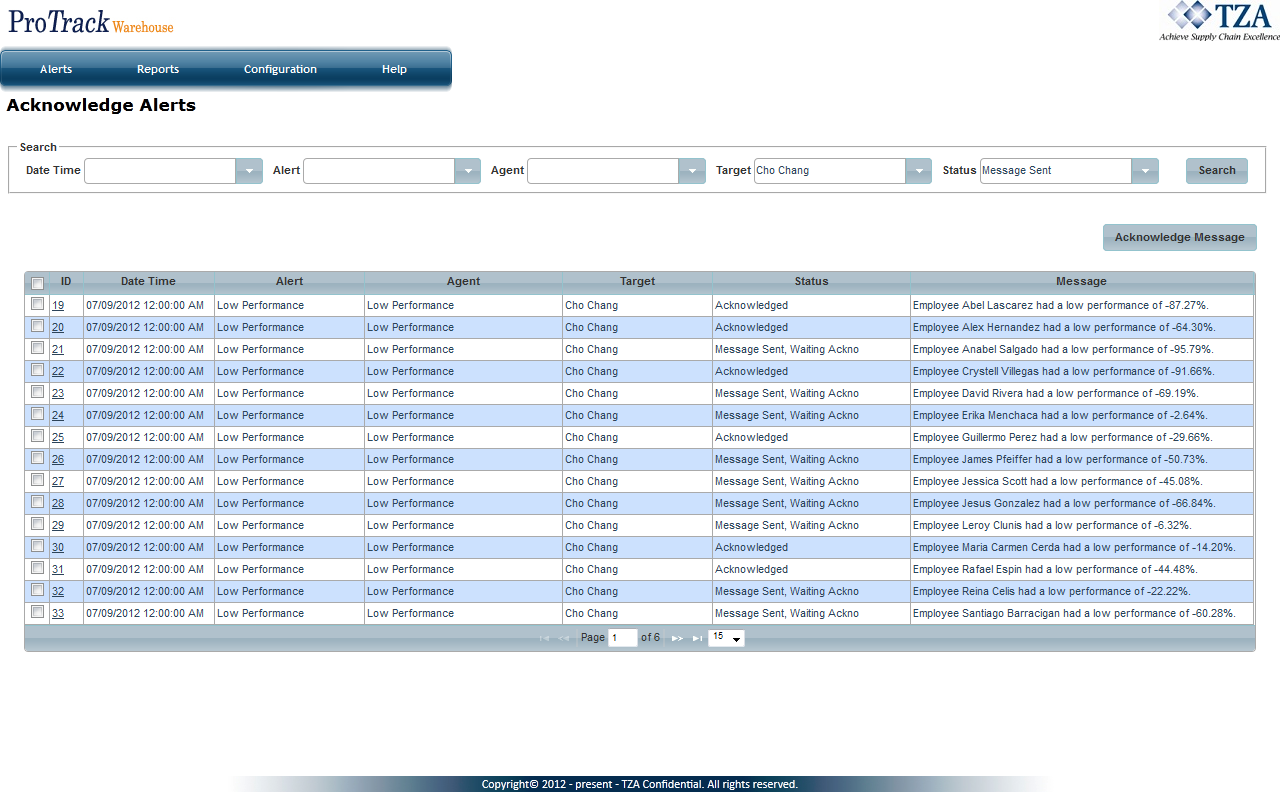
- The status of the alerts will be changed to Acknowledged.
Fig.4 Alerts Have Been Acknowledged
Alert History
The Alert History screen is a listing of alert actions that have been executed, and their status, if any. Every alert action, including wait and repeat, gets logged into history. If the action was an email, the email message gets saved. If the alert was an email requiring an acknowledgement, it will get logged with the status of acknowledged or waiting for acknowledgement. By clicking on one of the entries, you get a pop-up the more detailed information regarding the alert, such as when and who acknowledged an email action.
Fig.5 Alert History
Creating an Alert
To create an alert:
- Subscribers must be created to know who will be notified.
- Alerts must be configured to determine what action will be performed.
- Agents must be configured to allow some sort of data input for the alert to be triggered.
- Events must be configured to generate the data that can be used for alerting.
- Event Scheduler must be configured to determine when the alert should be executed.
Overview
Content Tools


