Documentation for ProTrackWarehouse 2018.1.
- ProTrack has the ability to shrink breaks, lunches, and/or delays to prevent them from remaining in ERR status if there is no worked assignment large enough to accept them. Alternatively, breaks and lunches can be split into smaller amounts of time and applied to worked assignments in order to apply the full duration of the break and/or lunch to the employee's day. There is an additional option to delete any breaks or lunches that fall after the TA End of Shift from an employee's day. These functions were added to reduce the need for manual removal of breaks, lunches, and delays in ERR status from each employee's day.
Rules for Shrinking/Splitting of Breaks, Lunches, & Delays:
- Only one option can be enabled at a time: Shrinking or Splitting
- Delays cannot be split.
Shrinking
- In order to shrink a break, you must click on the icon next to the break you wish to shrink.
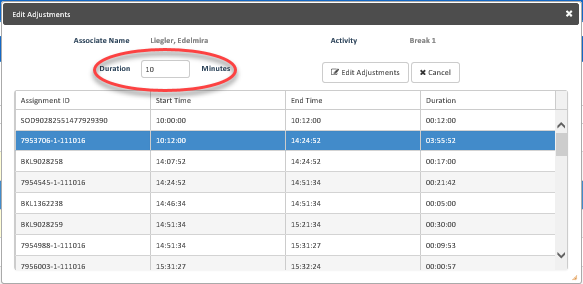
- The Edit Adjustments window will pop-up. If you wish to shrink the duration of the break, enter the correct duration in the box circled below.
- Click the button to accept the changes.
Splitting
- If you want to split a break, you must first shrink the first break time to the actual amount of time the first part of the break was taken (see above for instructions).
As you can see above, the duration of the highlighted break starts at 17:00:00.
As you can see above, the duration was shrunk to 10:00:00 using the process explained above in Shrinking. - After shrinking the first half of the break, you will want to add another break in after the assignment that split the break.
- Select the assignment in which you want the second half of the break to follow. For instance, if the break is split between on assignment, then select the assignment following the first part of the break.
- Click the "Add+" button.
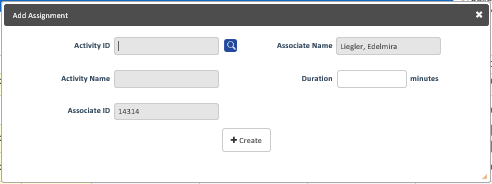
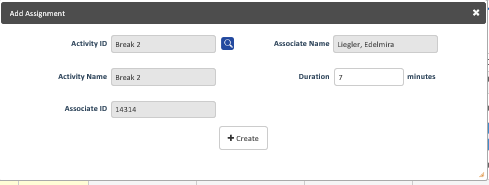
- The pop-up window appears.
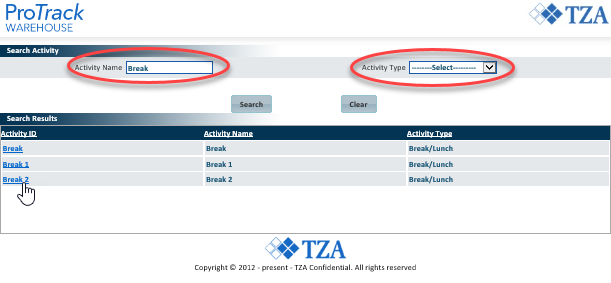
- Look up the Activity ID by clicking on the icon next to the fill in box.
- Search the Activity by Activity Name or by Activity Type then select the activity which you wish to split (in this case a break, lunch, or delay).
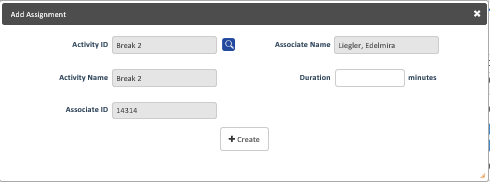
- Once you select an activity, the Activity ID and the Activity Name will auto-populate.
- Enter the remaining break, lunch, or delay time in the Duration box. Make sure to enter the value in whole minutes.
- Click "Create+". You will see the new break added to the table.
Click on any of the images above to enlarge.
Info
- When breaks, lunches, or delays are shrunk, they will have a length of the associated worked assignment duration minus 1 second.
- When breaks or lunches are split, the splits will have lengths of the associated worked assignment duration minus 1 second. Also, the sum of all the break splits or lunch splits will equal the full duration of the break or lunch as if it were applied as a whole.
Overview
Content Tools


