Documentation for ProTrack Warehouse 7.5.
The Shifts screen helps you group schedules for reporting and labor balancing. This screen will allow you to add, search, view, and delete shifts in ProTrack Warehouse.
To access the Maintain Shifts screen:
- Log in to ProTrack Warehouse.
- Select Shifts under the Employee menu. The Maintain Shifts screen appears.
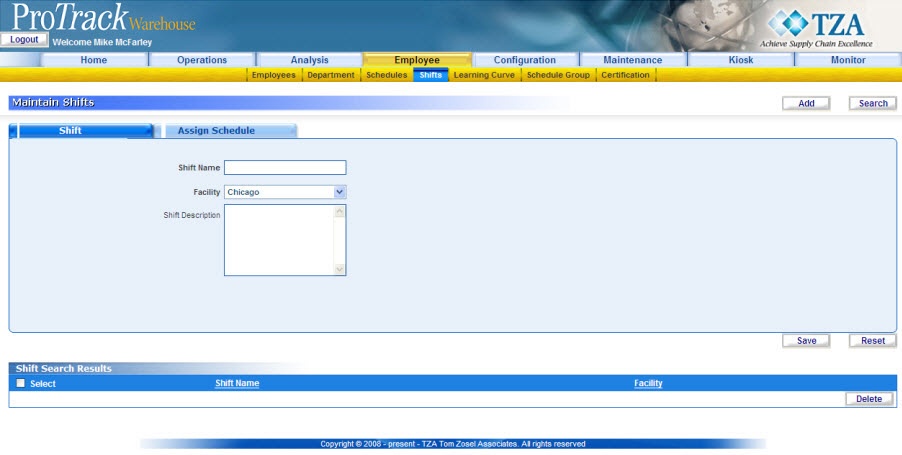
Fig.115 Maintain Shifts
Maintain Shifts Field Description
Table. 20 Maintain Shifts DescriptionsField
Description
Shift Name
As it will appear on reports.
Facility
The facility this shift is related to.
Shift Description
Detailed description relating to the shift.
Maintain Shifts Tabs Field Description
Table. 21 Maintain Shifts Tabs DescriptionsTab
Description
Shift
Displays the details of the shift.
Assign Schedule
Displays the schedules assigned to the selected shift.
Adding New Shifts
To add a new shift:
- Type the Shift Name.
- Select the facility name from the drop down list.
- Type any Shift Descriptions in the text area.
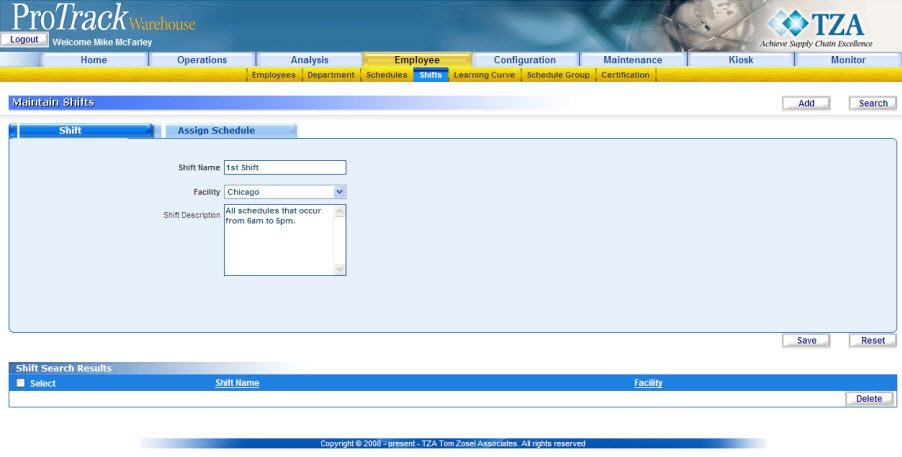
Fig.116 Maintain Shifts - Add New Shift - Click Assign Schedule tab.
Fig.117 Maintain Shifts - Assign Schedules - Click the 'Select Schedules' and a popup window appears listing all the schedules.
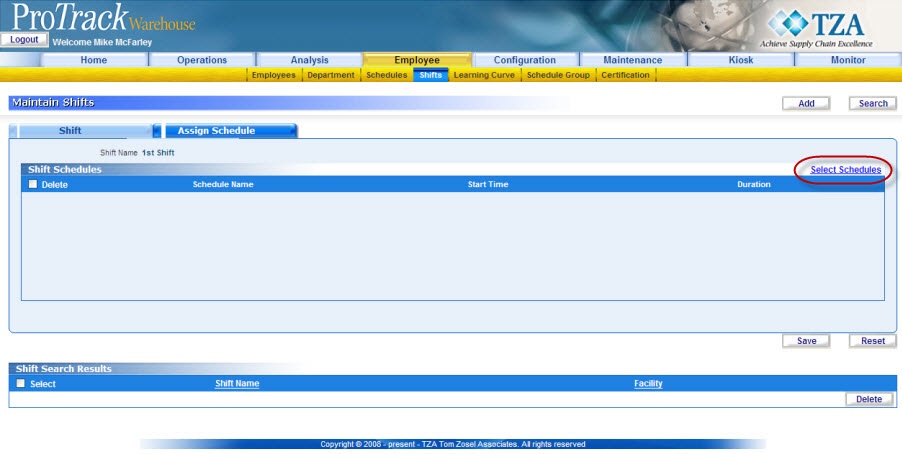
Fig.118 Maintain Shifts - Selecting Schedules - Search for the appropriate schedule(s) by providing the schedule name or facility. The corresponding schedules are listed.
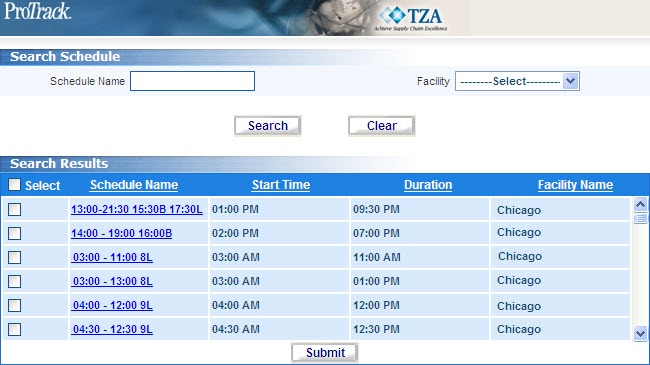
Fig.119 Maintain Shifts - Schedules List - Select the check box of each schedule you want to associate to the shift.
Tip
- To select all the schedules in the 'Search Results', select the Select check box and all the schedules are selected.
- Click
 to assign the selected schedules to the shift. The selected schedules are listed in the 'Shift Schedules' list in the Maintain Shift screen.
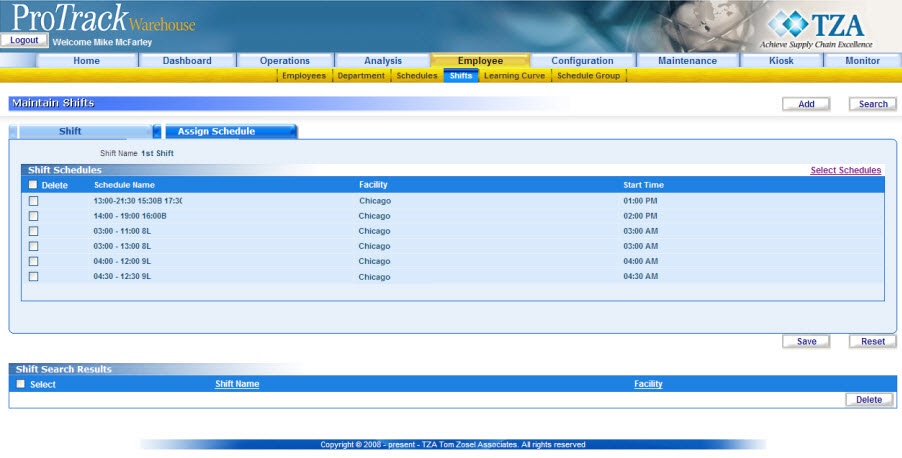
Fig.120 Maintain Shifts - Add Schedules
Tip
- If you do not want to save a Schedule associated to a shift, select the Delete check box of the corresponding Schedules and click on Save.
- Click
 to save the Shift.
Searching Shifts
- To search for particular shifts:
- Click
 in the Maintain Shifts screen and a popup window appears.
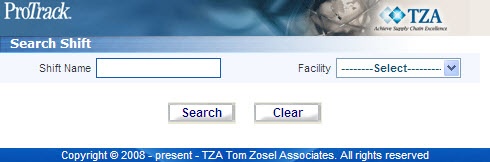
Fig.121 Maintain Shifts - Search Shift - Type a shift name or select a facility from the drop down list.
Tip
- Type the first character of a shift to list all the shifts starting with that particular character. For example, to search the shifts starting with the character 'M', enter 'M' in the Shift Name field to list shifts such as 'Morning Shift', 'MidShift' and so on.
- If no search criteria are specified all the activities will be listed in the 'Shift Search Results' section.
- Click in the Search Shift screen. The records matching the selected criteria are listed in the 'Shift Search Results' section of the Maintain Shift screen.
Viewing and Editing Shifts
Shifts can be viewed and edited from the 'Shift Search Results' section in the Maintain Shifts screen.
To view and edit the shift:
- Search and list the Shifts you want to view and edit in the 'Shift Search Results' section by providing a search criteria.
- Click shift name link from the 'Shift Search Results' section to edit a particular shift. The details of the selected shift appear in the corresponding fields in the Maintain Shifts screen.
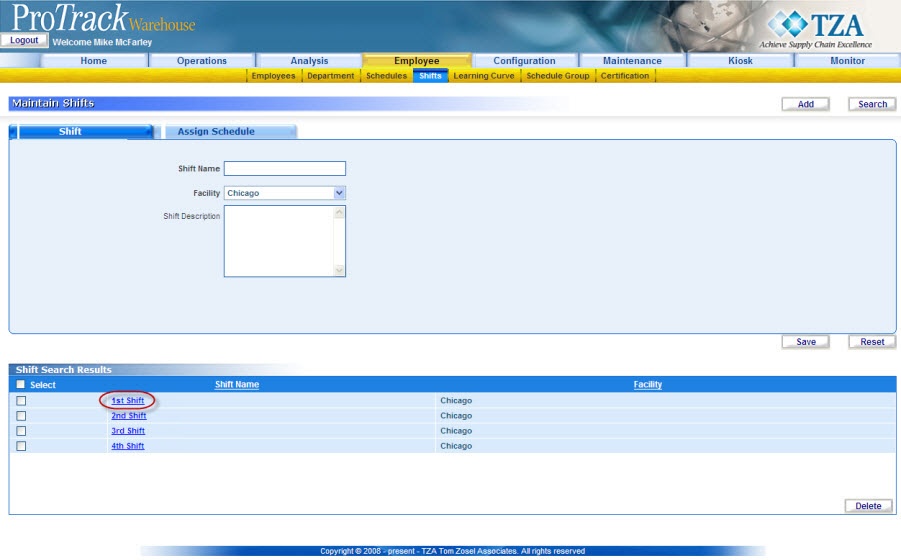
Fig.122 Maintain Shifts - View Shift - Change the required fields.
Info
- The field Shift Description is editable and but the Shift Name field is not.
- The Facility list is not available if schedules are associated with the shift.
- To assign schedules to the existing shift, click the Assign Schedule Tab.
- To delete schedules assigned to the shift, select the check box of each schedule and click the button.
- Click to save the changes.
Info
- If you have made the changes in the fields and do not want to save the details, click Reset before you save the changes.
- If you want to add a shift, click Add to clear the fields and to bring the screen to add mode.
Overview
Content Tools