Documentation for ProTrackWarehouse 2019.1.
Agents provide the functionality of taking some sort of data input, filtering out the fields that you want to act upon, and then calls an alert.
To create an agent:
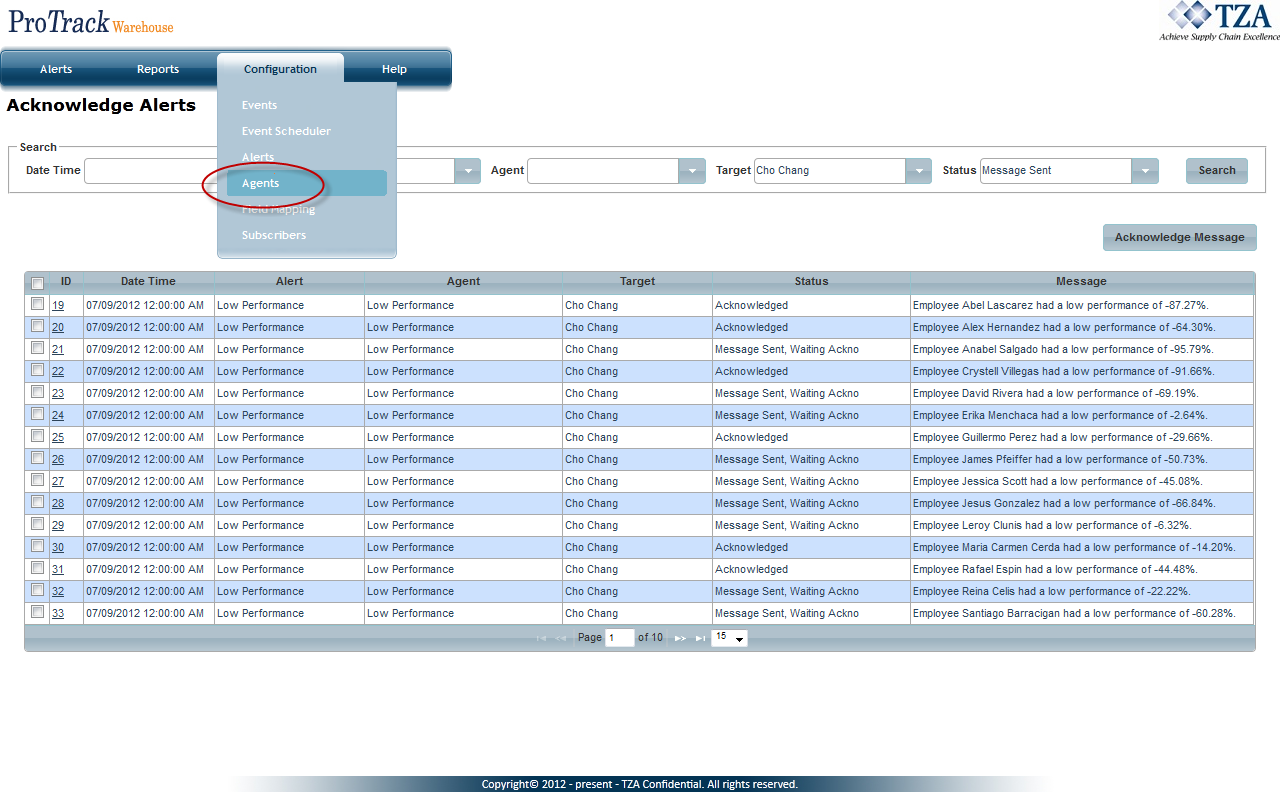
- Click on Agents under the Configuration menu.
Fig.1 Creating Agent
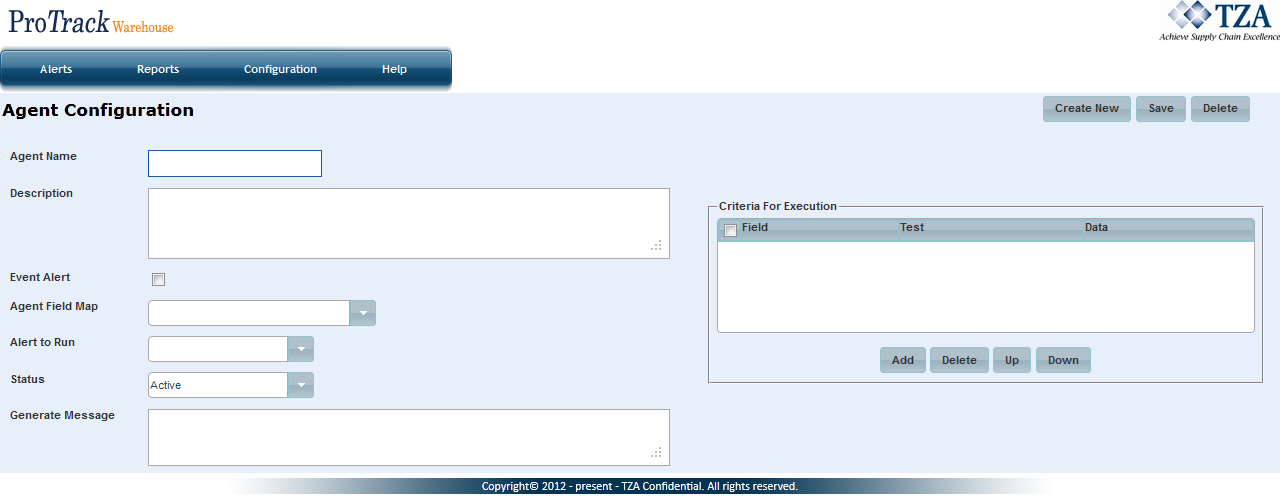
- Click and the Agent Configuration screen appears.
Fig.2 Agent Configuration
- Enter the Agent Name along with a Description.
- Select the check box Event Alert to use the Agent for future alerts.
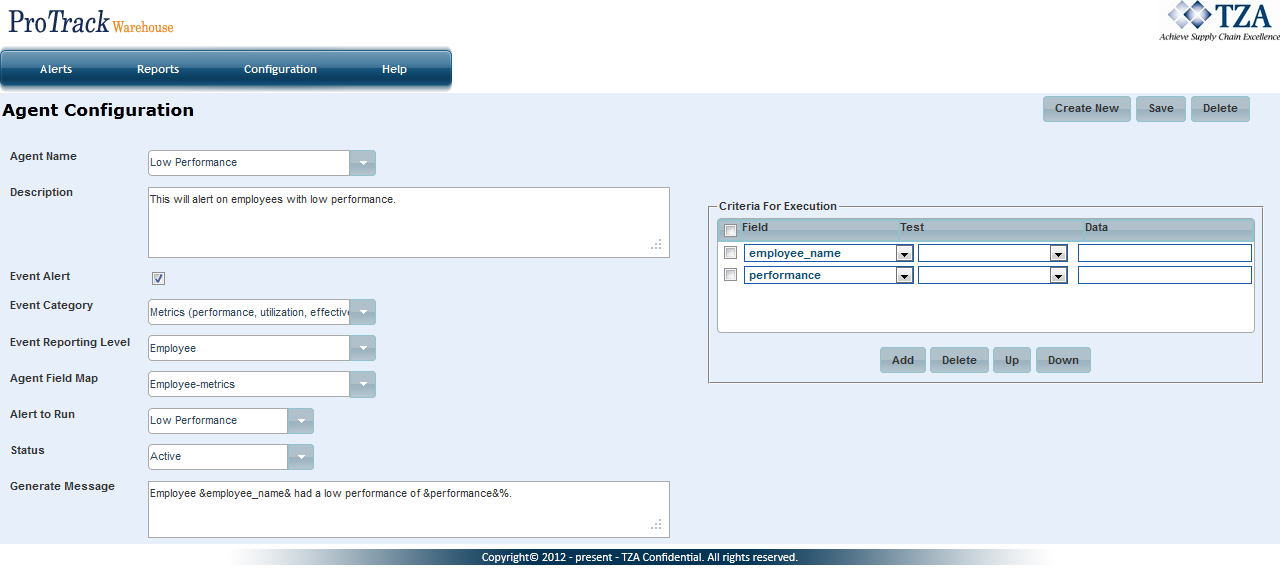
- Select the Event Category, Event Reporting Level, Agent Field Map, Alert to Run, and Status from each of the corresponding drop down lists.
- Click on the right hand side to add a Criteria For Execution. Select the criteria from the drop down list. Repeat this step until all criteria have been selected.
Enter a message that will be sent in the body of an email to subscribers.
Fig.3 Agent ConfigurationInfo
- A message can contain any text you want, and it can also display the values in the data fields. To use the values of these fields in the message, simply put an “&” character around each side of the field.
- Click and the agent along with the configurations will be saved.
Overview
Content Tools


