Documentation for ProTrack Warehouse 7.5.
Zones in ProTrack Warehouse are used for reporting and selecting standards. Zones can also be used when creating Learning Curves. The options in the Maintain Zone screen are available depending on the user privileges.
Caution
- There can only be one Zone for each assignment in the WMS transaction feed. Otherwise, the Standards will not be applied correctly and thus the reporting will not be accurate.
To access the Maintain Zone screen:
- Log in to ProTrack Warehouse.
- Select the Zone tab under the Maintenance menu. The Maintain Zone screen appears.
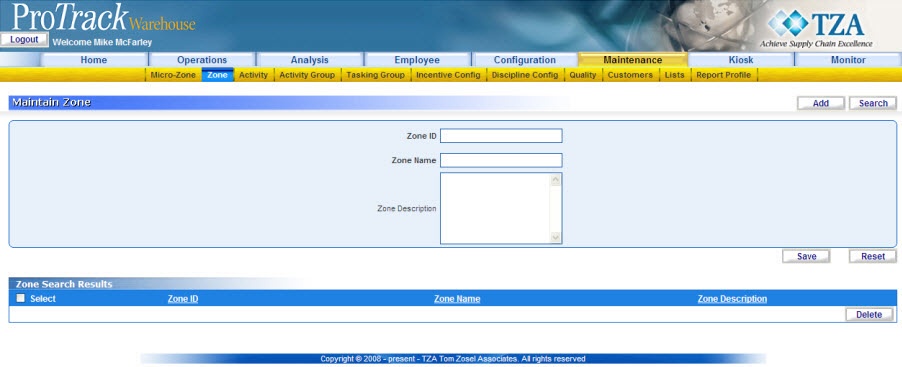
Fig.253 Zone
Zone Field DescriptionTable 65. Zone Field DescriptionsField
Description
Zone ID
ID as it will be sent in the WMS transaction file.
Zone Name
As it will appear on reports.
Zone Description
Describe the Zone.
Adding A Zone
To add a new zone:
- Type the Zone ID, Zone Name and Zone Description.
- Click
 to save the zone.
Searching Zone
To search for a particular zone:
- Click
 in the Maintain Zone screen and the Search Zone screen appears.

Fig.254 Zone - Searching Zone - Type the Zone ID or Zone Name.
Tips
- To list Zones with names starting with a particular character, enter the character into the field. For example, to search zones starting with the character 'C', enter 'C' in the Zone Name to list zones with names starting with C.
- If no search criteria are specified all the zones will be listed in the 'Zone Search Results' section.
- Click Search in the Search Zone screen, the records matching the search criteria are listed in the 'Zone Search Results' section of the Maintain Zone screen.
Maintain Zone – Zone Search Results
- If no search criteria are specified all the zones will be listed in the 'Zone Search Results' section.
View and Edit Zone
The Zones can be viewed or edited from the 'Zone Search Results' section in the Maintain Zone screen.
To view and edit the Zone:
-
- Search and list the zones in the 'Zone Search Results' section by providing a search criteria (Refer Search Zones).
- Click the zone name of the zone from the 'Zone Search Results' section. The details of the zone appear in the corresponding fields in the Maintain Zone screen.
- Change the required fields (Zone ID, Zone Name, and Zone Description)
- Click Save to save the changes.
- If you have made the changes in the fields and do not want to save the details, click Reset before you save the changes.
- If you want to add a zone at this point, click Add to clear the fields and to bring the screen to the add mode.
Overview
Content Tools