Documentation for ProTrack Warehouse 7.5.
"Schedules" are used in ProTrack Warehouse to define when an employee's work day starts and ends, and when he or she takes breaks and lunches. ProTrack uses Schedules to automatically allocate time for these daily activities that are typically not captured or recorded by any other host systems (such as WMS). These scheduled activities may include:
- Start of Shift
- Breaks (1 or more)
- Lunch
- End of Shift
A single employee may work different Schedules on different days - this day-to-day configuration is set up using a Schedule Group.
Maintaining Schedules
The Schedules screen allows creating, viewing, editing, and deleting of schedules within ProTrack Warehouse. Available operations on this screen will vary depending on the user privileges.
To access the Schedules screen:
- Log in to ProTrack Warehouse.
- Select Schedules under the Employee menu. The Maintain Schedules screen appears.
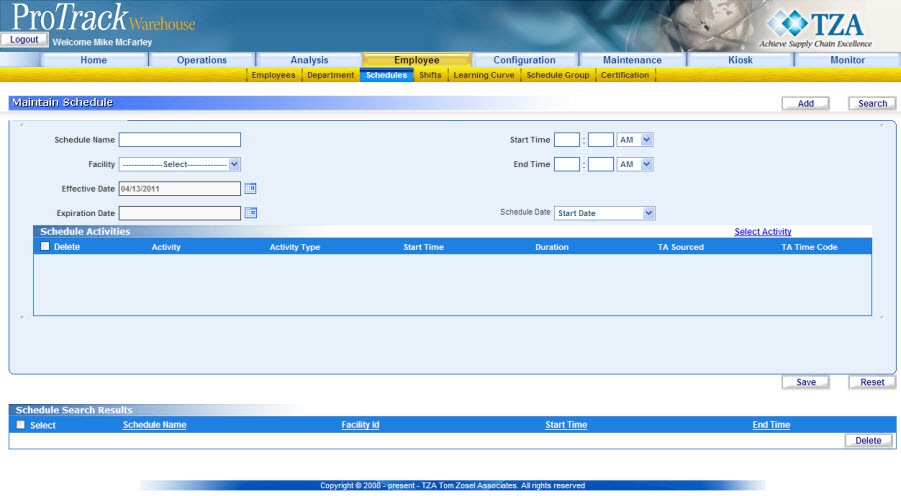
Fig.115 Maintain Schedule
Maintain Schedule Field Description
Table 20. Maintain Schedule DescriptionsField
Description
Schedule Name
Name for a schedule which can be alphanumeric and must be unique.
Facility
Facility which a schedule will be associated to.
Effective Date
Date which a schedule will be effective.
Expiration Date
Date which a schedule will expire.
Start Time
Start time of a schedule.
End Time
End time of a schedule.
Activity Type
Select the activity type from the list: Start of Shift = Start of day, End of Shift = End of day, Breaks/Lunch = Blank.
Start Time
Enter the start time for this activity.
Duration
Enter the duration in minutes or hours for this activity.
TA Sourced
Start of Shift, Lunch, and End of Shift timestamps can be updated based on a Time and Attendance punch. If the activity can be updated by Time and Attendance then select the check box that corresponds to the activity.
TA Time Code
If the activity timestamp can be updated by Time and Attendance punch then select from the list what timestamp to accept: Start of Shift = Start Time, End of Shift = End Time, and Lunch = Lunch.
Adding a Schedule
To add a schedule:
- Type the schedule name. This cannot be changed once the schedule is saved, so it is recommended you use a descriptive name that will not change over time.
- Select the facility for which the Schedule will be used from the drop down list.
- Click
 to set the effective date and expiration date of the schedule.
 - Enter the start and end times of the schedule.
Info
- Users familiar with earlier versions of ProTrack Warehouse may note the absence of the Start and End buffer values on this screen. As of version 7.4.4, buffers are no longer explicitly configured for each Schedule, but rather are derived automatically at the time of work schedule creation. For an explanation on how this works, see the Data Processing chapter in the ProTrack Warehouse User Manual.
- Click 'Select Activity' link. Select an activity from the popup window.
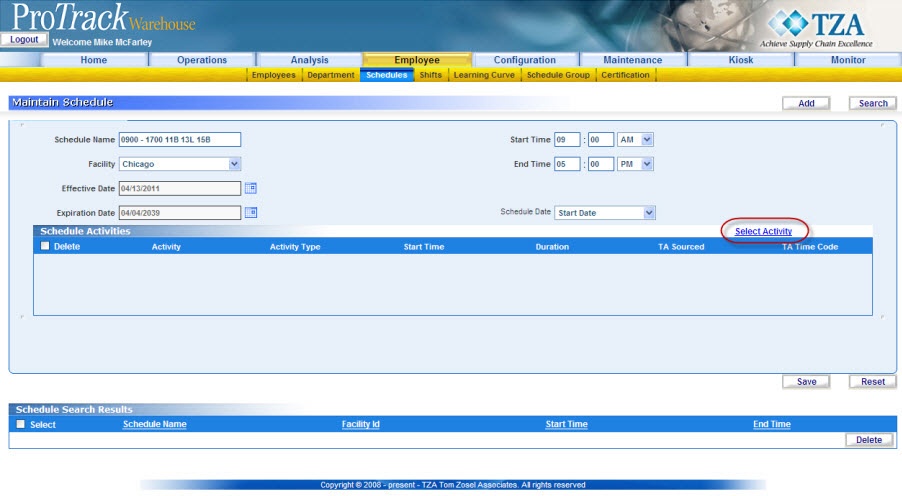
Fig.116 Maintain Schedule - Adding A Schedule - Select the Activity Type from the drop down list. For breaks select the blank and for start or end of shift select those items accordingly.
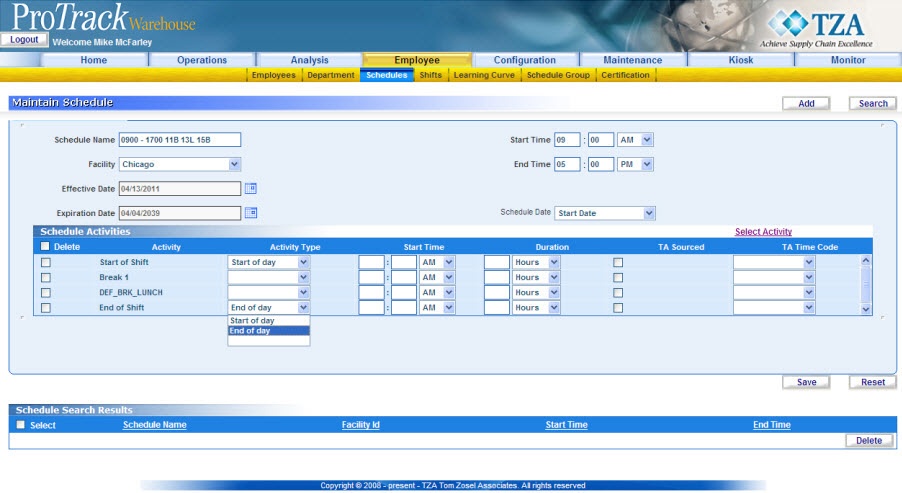
Fig.117 Maintain Schedule - Select Activity Types - Type the start time and duration for each activity.
Tip
- For the end of shift activity, be sure the entered start sime is X minutes prior to the schedule's end time, where X is the Duration of the end of shift activity.
- Scheduled activities may be 'TA-Sourced', meaning their times may be adjusted by a Time & Attendance import file. Select the check box for any scheduled activities which may be adjusted by a TA import file. Breaks, Lunches, Start of Shift, and End of Shifts may all be TA-sourced.

Fig.118 Maintain Schedule - TA Sourced Activities - Click
 to save the schedule.
Info
- Start of Shift and End of Shift must have at least a 1-minute duration.
- Schedule Activities can only include: Start of Shift (SOD), End of Shift (EOD), Breaks (Break 1, Break 2, etc), and Lunch.
- To delete the activities selected, select the delete check box of the corresponding activities and click .
- Once a Schedule has assignments associated to it, the Schedule cannot be deleted. If there are changes required in the Schedule use the Copy button to create a variant of this Schedule. The Schedule Name must be altered.
Searching Schedules
To search for particular schedules:
- Click
 in the Maintain Schedule screen and a popup window appears.
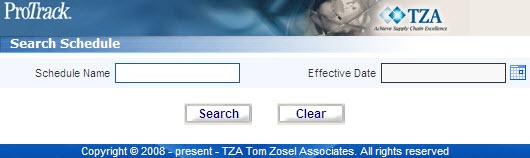
Fig.119 Maintain Schedule - Search Schedule - To search for particular schedules, type the Schedule Name or click to select the Effective Date.
- Click in the Search Schedule screen. The records matching the selected criteria are listed in the 'Schedule Search Results' section of the Maintain Schedule screen.
Tip
- To list the schedules with schedule names starting with a particular character, you can type the character and click . The Schedules starting with the given character are displayed in the 'Schedule Search Results' section.
- If no search criterion is specified all the schedules will be listed in the 'Schedule Search Results' section.
- To list the schedules with schedule names starting with a particular character, you can type the character and click
Viewing and Editing Schedules
To view and edit a schedule:
- Search and list the schedules you want to view and edit in the 'Schedule Search Results' section by providing a search criterion.
- Click the selected schedule name link from the 'Schedule Search Results' section. The details of the selected schedule appear in the corresponding fields in the Maintain Schedule screen.
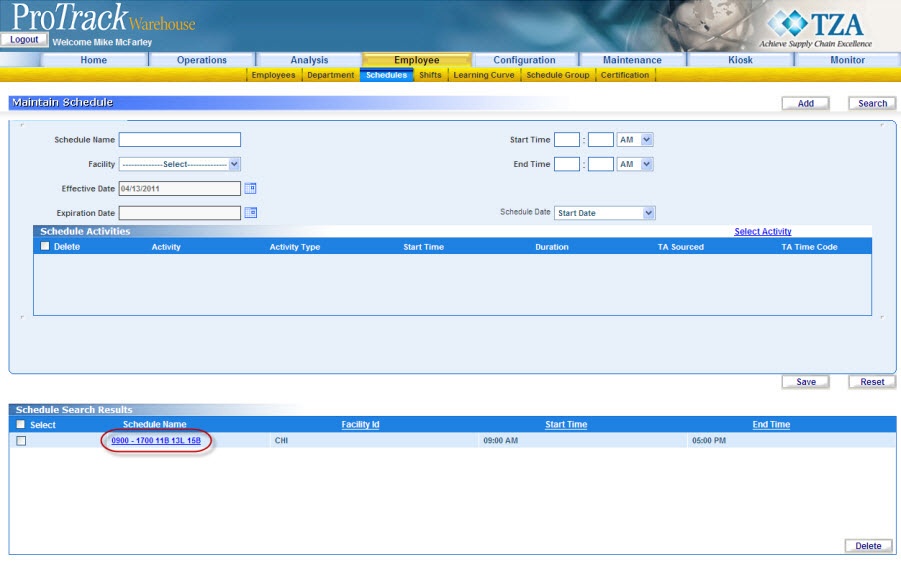
Fig.120 Maintain Schedule - Schedule Search Results - Change the required fields (Facility and Schedule Name are not editable). You can change activity details in the 'Schedule Activities' section. To add new activities to the schedule, click the Select Activity link.
- Click to save the changes.
Info
- If you have made the changes in the editable fields and do not want to save the details, click Reset before you save the changes.
- If you want to add a schedule at this point in time, Click Add to bring the Maintain Schedule screen to the Add mode.
- To delete the activities selected, select the delete check box of the corresponding activities and click on the button.
Overview
Content Tools